Uninstalling the Printer Driver
Solution
When you no longer need installed printer drivers or the Product Extended Survey Program, you can uninstall them to delete them from your computer.
1. Log on to the computer with an administrator account.
2. Display [Programs and Features] or [Add or Remove Programs].
3. Select the printer driver that you want to uninstall, and click [Uninstall/Change] or [Change/Remove].
 The uninstaller starts.
NOTE
If you cannot find the printer driver that you want to uninstall
- Start the uninstaller from the User Software CD-ROM/DVD-ROM or from the printer driver file that you downloaded.
3-1. Insert the User Software CD-ROM/DVD-ROM into the drive on the computer.
- To start the uninstaller from a printer driver file that you downloaded, carry out the following step.
3-2. Open the folder where the uninstaller is stored.
 32-bit operating system
[UFRII]  [uk_eng] [32BIT] [misc] folders of the CD-ROM/DVD-ROM or downloaded file
[uk_eng] [32BIT] [misc] folders of the CD-ROM/DVD-ROM or downloaded file64-bit operating system[UFRII] [uk_eng] [x64] [misc] folders of the CD-ROM/DVD-ROM or downloaded file
[uk_eng] [x64] [misc] folders of the CD-ROM/DVD-ROM or downloaded fileNOTE
- If you do not know whether to specify the 32-bit version or the 64-bit version for Windows Vista/7/8.1/10/Server 2008/Server 2012/Server 2012 R2/Server 2016, see the "UFR II/UFRII LT Printer Driver Installation Guide" from the Canon website (canon.com/oip-manual).
3-3. Double-click "UNINSTAL.exe."
4. Select the printer that you want to uninstall, and click [Delete].
IMPORTANT
- If you click [Cleanup], then all files, directory information and other data related to all printers are deleted, not only for the selected printer but for all printers in the list. Normally you should use [Delete] to uninstall printer drivers. Click [Cleanup] when no printer is displayed in the list.
5. Click [Yes].
 The uninstall starts.
- When the following screen appears, click [Yes] or [Yes To All].
6. Click [Exit].
It is recommended that you use the Installer to uninstall an unnecessary driver.
IMPORTANT
- When you upgrade a driver, you can overwrite the old driver with a newer one. Uninstalling the driver is not required before the upgrade.
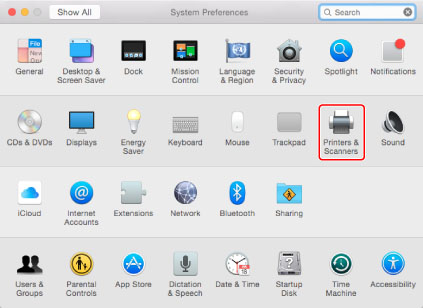
1. Click the [Print & Scan]/[Printers & Scanners] icon in [System Preferences].
2. Select the printer you use, then click [-].
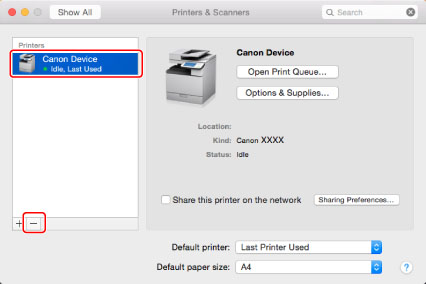
3. Delete the printers that are registered, then close the [Print & Scan]/[Printers & Scanners] dialog box.
4. Open Finder application of your macOS.
5. Select [Go] → [Go to Folder] from the menu bar.
6. Enter the following folder locations, click [Go], then delete the files and folders.
- Delete Example: You can delete files and folders by dragging them to the [Trash] icon in the Dock.
| Location | Files and folders to delete |
|---|---|
| /Library/Printers/Canon/ | CUPS_SFP or CUPS_Printer |
| /Library/Printers/PPDs/Contents/Resources/ | CNPZN***ZN.ppd.gz or CNPZU****ZU.ppd.gz |
 Where *** indicates a character string that represents the printer model.
 REFERENCE
When the [Authenticate] dialog box is displayed
- Enter the administrator's name and password, and then click [OK].
7. Close all open windows.
8. Restart your computer.
The printer driver is uninstalled.