Resizing Images
21-Mar-2017
8203306600
Solution
The procedure for shrinking an image`s resolution and saving it as a new image is explained below.
IMPORTANT
Here, instructions are given using IXUS 185 as an example. The position and shape of the operation buttons, the screens displayed, and the settings will differ depending on your device model.
1. Press the [  ] button to enter Playback mode.
 ] button to enter Playback mode.
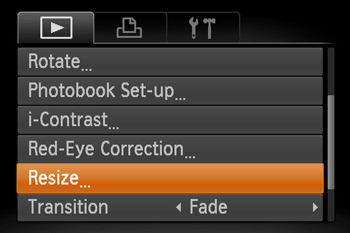
2. Press the [MENU] button and choose [Resize] on the [  ] tab.
 ] tab.
3. Press the [  ], [
], [  ] buttons to choose an image, and then press the [
  ] button.
 ], [
], [  ] buttons to choose an image, and then press the [
  ] button.
4. Press the [  ], [
], [  ] buttons to choose the size, and then press the [
  ] button.
 ], [
], [  ] buttons to choose the size, and then press the [
  ] button.
NOTE
Images cannot be resized to a higher number of recording pixels.
5. Press the [  ], [
], [  ] buttons to choose [OK], and then press the [
  ] button.
 ], [
], [  ] buttons to choose [OK], and then press the [
  ] button.
The image is now saved as a new file.

6. Press the [MENU] button.
Press the [  ], [
], [  ] buttons to choose [Processed img.], and then press the [
  ] button.
 ], [
], [  ] buttons to choose [Processed img.], and then press the [
  ] button.
The saved image is now displayed.
IMPORTANT
Editing is not possible for images shot at a recording pixel setting of [  ], [
], [  ], or saved as [
  ] in step 4.
 ], [
], [  ], or saved as [
  ] in step 4.
 NOTE
Choosing [Original image] in step 6 will display the original image.
This completes the steps for shrinking an image`s resolution and saving it as a new image.