Using Looks (Settings that affect the image) (XC15)
Solution
The camcorder can shoot using looks - settings that affect the image - related characteristics of the picture.
The camcorder has several pre-installed looks available and you can even create your own user-defined look based on one of the pre-installed looks. This function is available when the shooting mode is set to [M], [Av], [Tv] or [P].
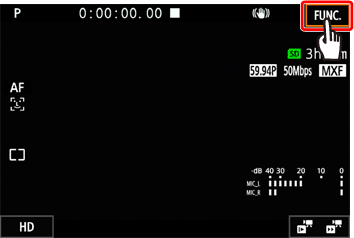
1. Touch [  ].
].
 ].
].
2. Touch [  : Looks ](in [
  ] mode) or [
  : Looks ](in [
  ] mode).
 : Looks ](in [
  ] mode) or [
  : Looks ](in [
  ] mode).
3. Select the desired option.
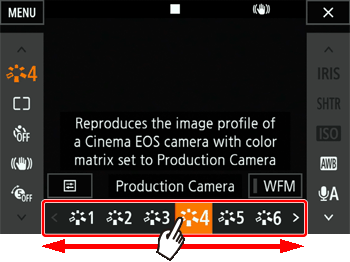
REFERENCE
- The selected icon will appear on the left side of the screen.
- For settings other than [
 : Canon Log ], you can adjust the settings with the procedure below before touching [
  ].
]. - Touching [WFM] will display the waveform monitor.
4. Touch [  ].
].
 ].
].- Options
| For Clips |  : Standard : Standard | Standard profile for general video shooting situations. |
 : Cinema EOS Std : Cinema EOS Std | Reproduces the look of an EOS digital cinema camera when [Color Matrix] is set to [Video]. | |
 : Neutral : Neutral | Reproduces the look of an EOS digital cinema camera when [Color Matrix] is set to [Neutral]. | |
 : Production Camera : Production Camera | Reproduces the look of an EOS digital cinema camera when [Color Matrix] is set to [Production Camera]. Uses the same gamma curve as that of [  : Wide DR ]. : Wide DR ]. | |
 : Color Matrix Off : Color Matrix Off | Reproduces the look of an EOS digital cinema camera when [Color Matrix] is set to [Off]. | |
 : Canon Log : Canon Log | Creates a picture with wide dynamic range that is suitable for processing in postproduction. | |
 : EOS Std. : EOS Std. | Approximates the look of an EOS digital SLR camera when the picture style is set to [Standard]  . . | |
 : Wide DR : Wide DR | Applies a gamma curve with a wide latitude and colors appropriate for the gamma curve. | |
 : Highlight Priority : Highlight Priority | Creates a picture with a natural gradation in tones and reduces overexposure in bright areas by not compressing highlights. When playing back a clip recorded with this setting, we recommend increasing the monitor’s overall brightness. | |
 : User Setting 1, : User Setting 1,  : User Setting 2 : User Setting 2 | Allows you to create a customized look. Start with one of the pre-installed looks and adjust the settings as necessary. | |
| For Photos |  : Standard : Standard | Standard profile for general photo shooting situations. |
 : Portrait : Portrait | Appropriate for taking photos of people, as this look brings out a sense of vitality in skin tones. | |
 : Landscape : Landscape | Makes colors in the landscape appear more vivid. | |
 : Neutral : Neutral | The details of the subject are emphasized, which helps create an image that is suitable for editing later. | |
 : Faithful : Faithful | Faithfully reproduces the colors of the subject. | |
 : Monochrome : Monochrome | Allows you to take a black & white photo. | |
 : Sepia : Sepia | Allows you to take a sepia-toned photo. | |
 : Clear : Clear | The contrast in the image is emphasized, making the subject clearer and stand out more. | |
 : Autumn Hues : Autumn Hues | Brings out the beauty of colors found in, for example, autumn foliage. | |
 : User Setting 1 , : User Setting 1 ,  : User Setting 2 : User Setting 2 | Allows you to create a customized look. Start with one of the pre-installed looks and adjust the settings as necessary. |
1. Touch [  ].
].
 ].
].
2. Adjust the desired setting by touching [-] or [+].
| Sharpness | 0 (low sharpness) to 7 (high sharpness) |
| Contrast*1 | -4 (low contrast) to +4 (high contrast) |
| Color Depth*2 | -4 (shallower colors) to +4 (richer colors) |
 : Production Camera ], [
  : Wide DR ] or [
  : Highlight Priority ].
*2 : Not available for [
 : Neutral ], [
  : Monochrome ] and [
  : Sepia ].
NOTE
- When using the [
 : Highlight Priority ] look, you can set [
  : System Setup] -> [
  : View Assistance ] to [
  : On ] to display a more accurate looking image on the screen.
 - When using the [
 : Highlight Priority ] look, taking photos during mode is not available.
You can create your user-defined looks based on one of the pre-installed looks. The camcorder can store two user-defined looks for clips and two for photos.
1. Touch [  ].
].
 ].
].
2. Touch [  : Looks ](in [
  ] mode) or [
  : Looks ](in [
  ] mode).
 : Looks ](in [
  ] mode) or [
  : Looks ](in [
  ] mode).
3. Select which user-defined setting icon to use.
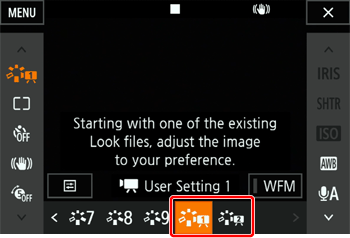
- Select [
 : User Setting 1 ] or [
  : User Setting 2 ] for clips and [
  : User Setting 1 ] or [
  : User Setting 2 ] for photos.
4. Touch [  ] and then touch [Standard].
 ] and then touch [Standard].
5. Select the look that will be the basis of the user-defined look.

6. Touch [Yes].

7. Touch [OK].
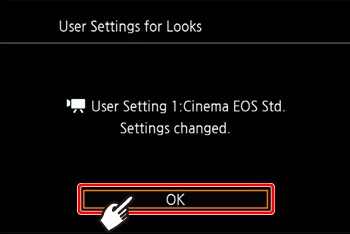
8. Adjust the settings as described in the previous section.

- The settings for [
 : Canon Log ] cannot be adjusted.
9. Touch [  ].
].
 ].
].
