Printing ID Photos (SELPHY CP1000)
Solution
Images can be printed for use in photo identification.
CAUTION
- The photo may not be accepted as an official ID photo, depending on the intended purpose. For details, contact the institution that requires the photo.
IMPORTANT
- Before printing images from a memory card or a USB memory, check to make sure that the printer is not connected to a camera or a computer.
- For memory cards that require an adapter, always insert the card into the adapter before inserting the adapter into the card slot. If you mistakenly insert the memory card into the card slot without an adapter, you may not be able to remove the card from the printer.
- For instructions, refer to the memory card or adapter user manual.
- Use a memory card formatted with the device you shot the photos with. Images on cards formatted with a computer may not be recognized.
- Images may not be displayed or printed correctly depending on their size or if they have been edited on a computer.
- JPEG images conforming to the Exif standard can be printed with SELPHY.
- For computer or photo software instructions, refer to the relevant user manual.
Choose from the following three sizes.
| Size | Details |
|---|---|
| [Custom] | Specify the length of the long and short sides, and then print. |
| [Standard] | Print a photo that complies with the international ICAO standard. |
| [Dual] | Print two sizes: 50x50 mm (approx. 2.0x2.0 in.) and 45x35 mm (approx. 1.8x1.4 in.). |
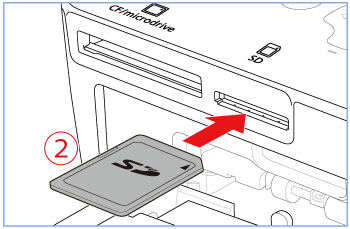
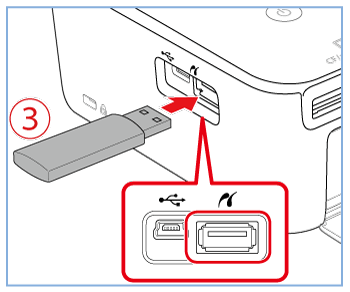
In this section, example procedures are shown using an SD memory card. You can print images by performing the same operations with USB memory or a memory card other than an SD memory card.
1.  Turn on SELPHY
  and insert the memory card
  or USB flash drive.
Turn on SELPHY and insert the memory card or USB flash drive.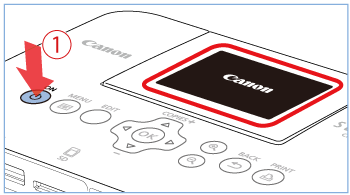
NOTE
Insert the memory card with the label face-up.
REFERENCE
For more information, please refer to Printing images with your new SELPHY CP1000 photo printer .
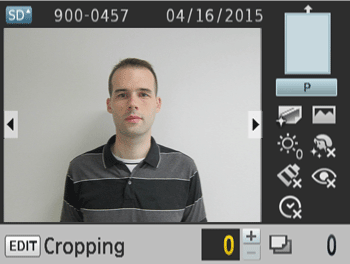
2. The following screen appears on the printer's [LCD monitor].
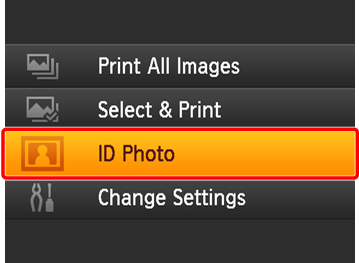
3. Specify ID photo printing.
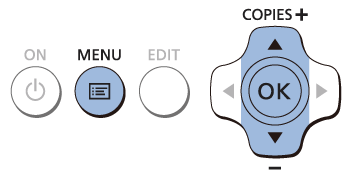
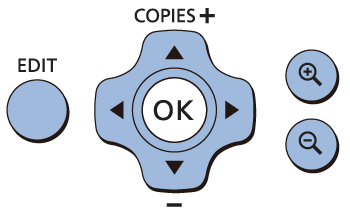
- Press the [
 ] button.
 - Press the [
 ], [
], [  ] buttons to select [ID Photo], and then press the [
  ] button.
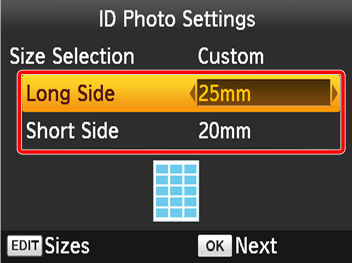
4. Specify the finished size of the photo.
- Press the [
 ], [
], [  ] buttons to choose [Custom].

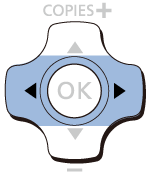
- Press the [ ], [ ] buttons to select [Long Side], and then press the [ ], [ ] buttons to specify the length. Specify the [Short Side] length, and then press the [OK] button again. Note that options available for [Short Side] are automatically updated based on the [Long Side] length.
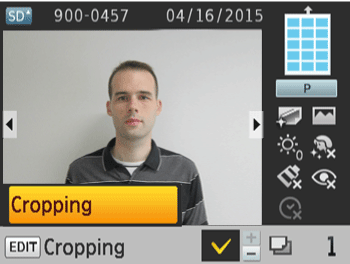
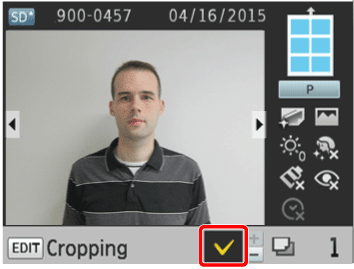
5. Choose an image to print.
- Press the [ ], [ ] buttons to select an image, and then press the [ ] button.[
 ]is shown in the lower right.


NOTE
Up to two images can be selected with [Custom.]
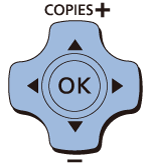
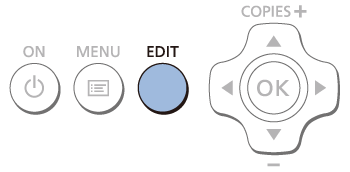
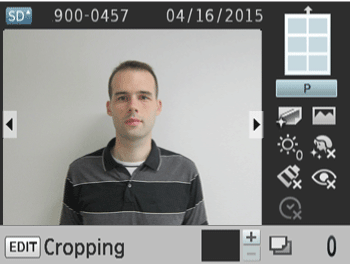
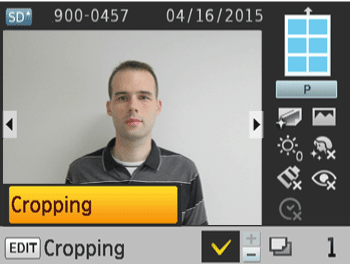
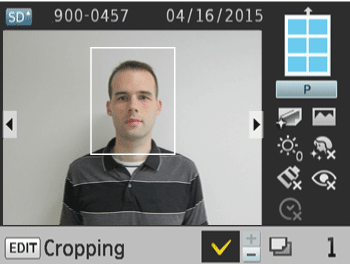
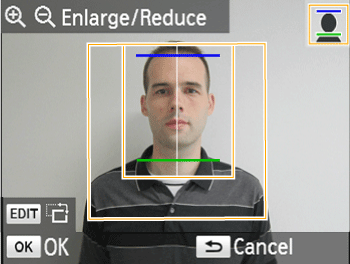
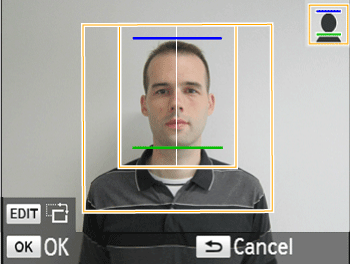
- Press the EDIT button to specify the cropping area.
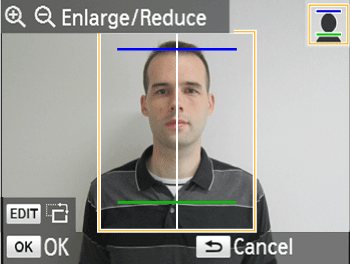
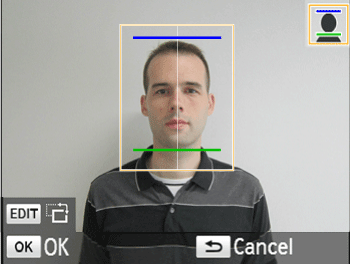
- Press the [ ] button.
- To switch the crop frame between portrait and landscape orientation, press the [EDIT] button.
- To move the crop frame, press the [ ], [ ], [ ], [ ] buttons.
- To enlarge the crop frame, press the [
 ] button, and to reduce it, press the [
  ] button.
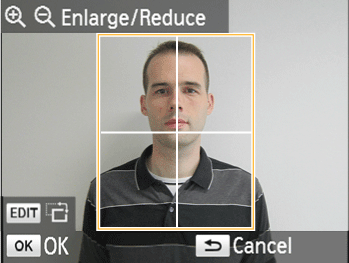
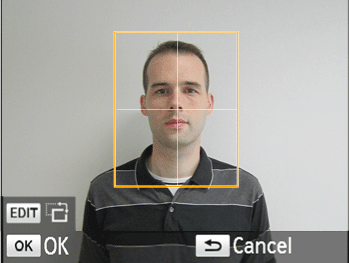
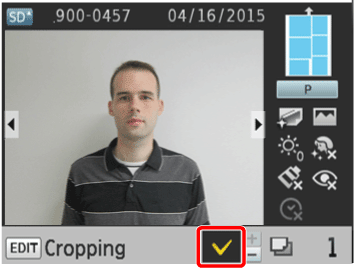
- To confirm the cropping area and return to the image display screen, press the [ ] button.

6. Press the [  ] button, and printing will start.
] button, and printing will start.
- Settings are cleared after printing.
IMPORTANT
- Card-size paper cannot be used.
- [Borders] settings are not applied, and dates are not printed.
- Selecting two images in step 3 will produce an equal number of prints of each image per sheet, in your specified layout. Note that for layouts with an odd number of prints per sheet, the center frame on the sheet will be blank.
- Marks are printed in the four corners of each printed image as a guide for cutting out the photo.
REFERENCE
Many image size options are listed when you select [ID Photo] > [Size Selection] > [Custom]. To simplify size selection, you can edit the list to show only sizes used most often.
1. Access the setting screen.
- On the ID photo settings screen, choose [Size Selection] > [Custom], and then press the EDIT button.
2. Select sizes for display.
- To remove a size from the list, press the [ ], [ ], [ ], [ ] buttons to select the size, and then press the [ ] button.
- The check mark [ ] is cleared, and the size will no longer be listed on the [ID Photo Settings] screen. To include a size in the list, press the <o> button again to select the size, displaying [ ].
- Pressing the EDIT button clears all [ ]. When no sizes are selected, pressing the EDIT button selects all sizes, displaying [ ].
- Once you have selected the sizes to include in the list, press the [
 ] button.

- A warning message is displayed if you press the [ ] button when no sizes are selected. Press the [ ] button to return to the [Sizes] screen. Select at least one size to list, and then press the [ ] button.
In this section, example procedures are shown using an SD memory card. You can print images by performing the same operations with USB memory or a memory card other than an SD memory card.
1. Turn on SELPHY and insert the memory card or USB flash drive.
Turn on SELPHY and insert the memory card or USB flash drive.NOTE
Insert the memory card with the label face-up.
REFERENCE
For more information, please refer to Printing images with your new SELPHY CP1000 photo printer .
2. The following screen appears on the printer's [LCD monitor].
3. Specify ID photo printing.
- Press the [ ] button.
- Press the [ ], [ ] buttons to select [ID Photo], and then press the [ ] button.
4. Specify the finished size of the photo.
- Press the [ ], [ ] buttons, to choose [Standard]
- Confirm the size of the image, and then press the [ ] button.

5. Choose an image to print.
- Press the [ ], [ ] buttons to select an image, and then press the [ ] button.[ ]is shown in the lower right.
NOTE
With [Standard], two images can be printed on each sheet.
- Press the EDIT button to specify the cropping area.
- Press the [ ] button.
- To switch the crop frame between portrait and landscape orientation, press the [EDIT] button.
- To move the crop frame, press the [ ], [ ], [ ], [ ] buttons.
- To enlarge the crop frame, press the [ ] button, and to reduce it, press the [ ] button.
- To confirm the cropping area and return to the image display screen, press the [ ] button.
6. Press the [ ] button, and printing will start.
] button, and printing will start.- Settings are cleared after printing.
IMPORTANT
- Card-size paper cannot be used.
- [Borders] settings are not applied, and dates are not printed.
- Selecting two images in step 3 will produce an equal number of prints of each image per sheet, in your specified layout. Note that for layouts with an odd number of prints per sheet, the center frame on the sheet will be blank.
- Marks are printed in the four corners of each printed image as a guide for cutting out the photo.
In this section, example procedures are shown using an SD memory card. You can print images by performing the same operations with USB memory or a memory card other than an SD memory card.
1. Turn on SELPHY and insert the memory card or USB flash drive.
Turn on SELPHY and insert the memory card or USB flash drive.NOTE
Insert the memory card with the label face-up.
REFERENCE
For more information, please refer to Printing images with your new SELPHY CP1000 photo printer .
2. The following screen appears on the printer's [LCD monitor].
3. Specify ID photo printing.
- Press the [ ] button.
- Press the [ ], [ ] buttons to select [ID Photo], and then press the [ ] button.
4. Specify the finished size of the photo.
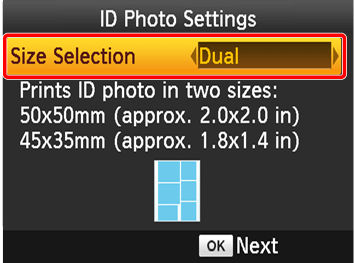
- Press the [ ], [ ] buttons, to choose [Dual]
- Confirm the size of the image, and then press the [ ] button.
5. Choose an image to print.
- Press the [ ], [ ] buttons to select an image, and then press the [ ] button. [ ] is shown in the lower right.

NOTE
With [Dual], only one image can be printed per sheet.
- Press the EDIT button to specify the cropping area.
- Press the [ ] button.
- To switch the crop frame between portrait and landscape orientation, press the [EDIT] button.
- To move the crop frame, press the [ ], [ ], [ ], [ ] buttons.
- To enlarge the crop frame, press the [ ] button, and to reduce it, press the [ ] button.
- To confirm the cropping area and return to the image display screen, press the [ ] button.

6. Press the [ ] button, and printing will start.
] button, and printing will start.- Settings are cleared after printing.
IMPORTANT
- Card-size paper cannot be used.
- [Borders] settings are not applied, and dates are not printed.
- Selecting two images in step 3 will produce an equal number of prints of each image per sheet, in your specified layout. Note that for layouts with an odd number of prints per sheet, the center frame on the sheet will be blank.
- Marks are printed in the four corners of each printed image as a guide for cutting out the photo.