Solution
NOTE
The screens displayed may differ depending on your computer’s operating system.
- In case of Digital Photo Professional Ver.3.x
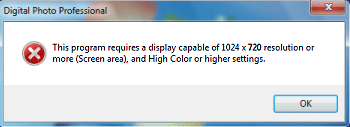
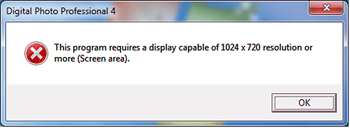
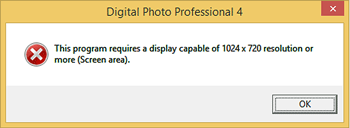
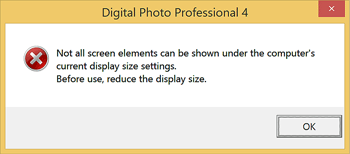
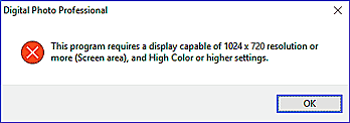
Digital Photo Professional cannot be run when the resolution of your monitor is set lower than 1024×720 or when color setting is lower than High Color (16bit).
- In case of Digital Photo Professional Ver.4.x
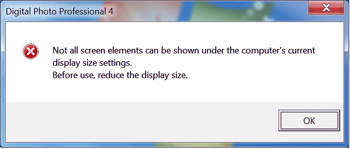
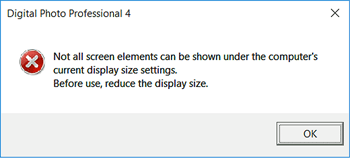
Digital Photo Professional cannot be run when the resolution of your monitor is set lower than 1024×720 or when the display size is set to large.
Follow the steps below and change the resolution, size and color settings of the computer monitor for Digital Photo Professional to be able to start.
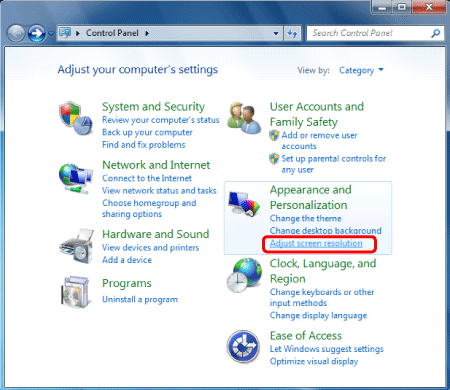
1. Click [Start] (

) > [Control Panel].
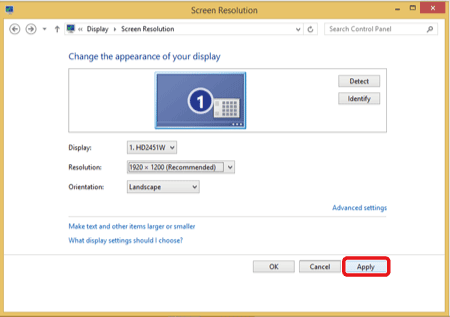
2. Click [Adjust screen resolution] under [Appearance and Personalization].
3. Click [Make text and other items larger or smaller].
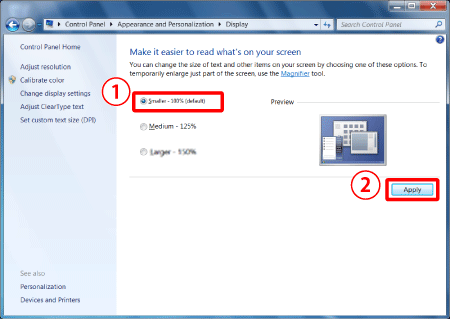
4. Confirm that the size is set to [Smaller – 100% (default)].
4-1. If the size is not set to [Smaller - 100% (default)], select [Smaller - 100% (default)] (

) and then click [Apply] (

).
4-2. Click the back button to return to the previous screen.
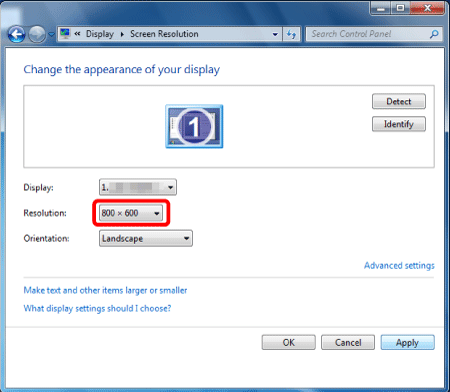
5. Change the resolution.
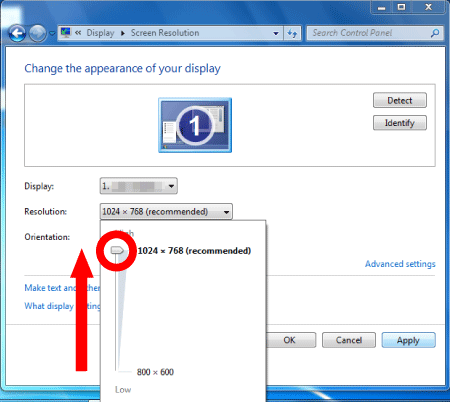
5-1. Click the menu next to [Resolution] to display the slider.
5-2. Move the slider up to select a resolution size of 1024×720 or larger.
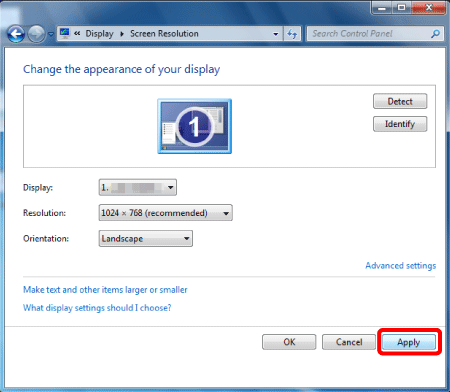
6. After closing the slider, click [Apply].
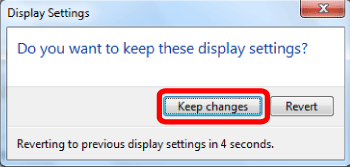
7. To implement the new resolution, click [Keep changes] on the below screen.
8. Next, change the color profile. Click [Advanced settings] to open the properties.
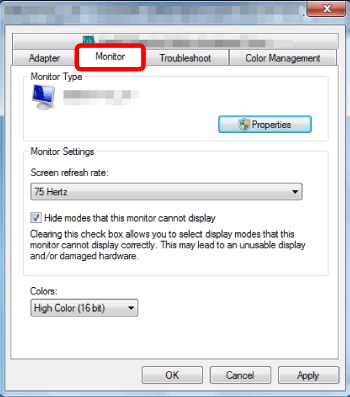
9. Click the [Monitor] tab.
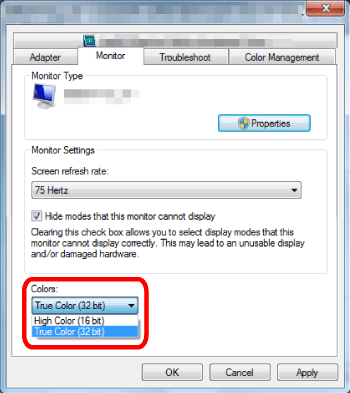
10. Set [Colors] to [High Color (16 bit)] or higher.
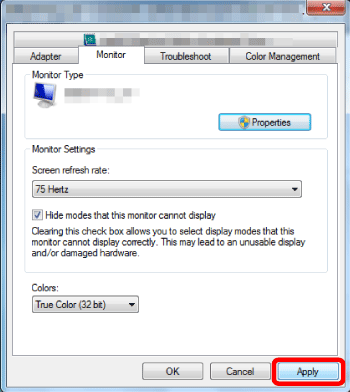
12. Click [Yes] and when the previous screen reappears, click [OK].
This concludes the procedure for changing the resolution, size and color settings.
- In case of Digital Photo Professional Ver.3.x
Digital Photo Professional cannot be run when the resolution of your monitor is set lower than 1024×720.
- In case of Digital Photo Professional Ver.4.x
Digital Photo Professional cannot be run when the resolution of your monitor is set lower than 1024×720 or when the display size is set to large.
Follow the steps below and change the resolution and size settings of the computer monitor for Digital Photo Professional to be able to start.
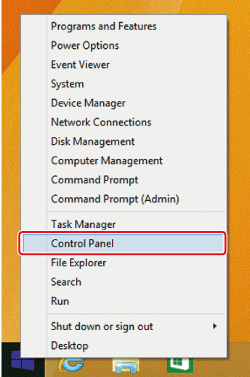
1. Right-click the [Start] icon (

) on the bottom left of the screen, and then select [Control Panel].
2. Click [Adjust screen resolution] under [Appearance and Personalization].
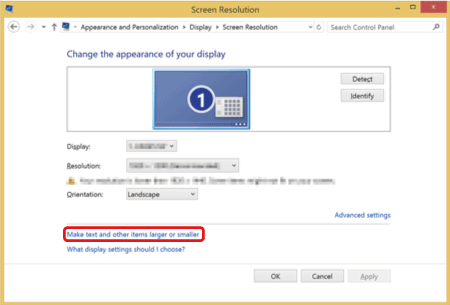
3. Click [Make text and other items larger or smaller].
4. Confirm that the size is set to [Smaller - 100 % (default)].
Select the [Smaller] value (

) and then click [Apply] (

).
5. Click the back button to return to the previous screen.
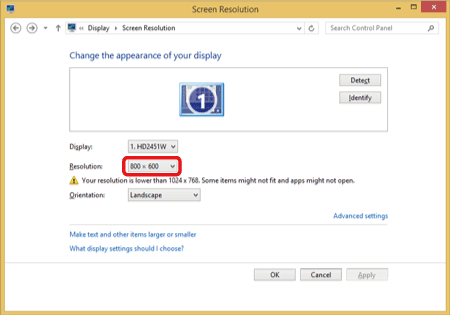
6. Change the resolution.
6-1. Click the menu next to [Resolution] to display the slider.
6-2. Move the slider up to select a resolution size of 1024×720 or larger.
6-3. After closing the slider, click [Apply].
7. To implement the new resolution, click [Keep changes] on the below screen.
This concludes the procedure for changing the resolution and size settings.
- In case of Digital Photo Professional Ver.3.x
Digital Photo Professional cannot be run when the resolution of your monitor is set lower than 1024×720.
- In case of Digital Photo Professional Ver.4.x
Digital Photo Professional cannot be run when the resolution of your monitor is set lower than 1024×720 or when the display size is set to large.
Follow the steps below and change the resolution and size of the computer monitor for Digital Photo Professional to be able to start.
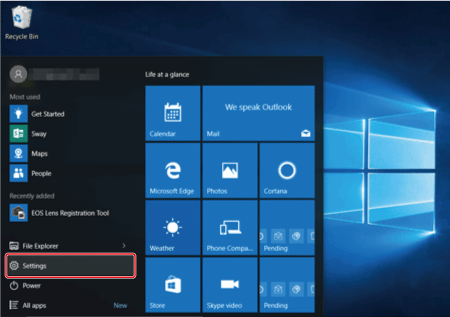
1. Click the [Start button] (

) on the bottom left of the screen.
2. Select [Settings] from the menu that appears.
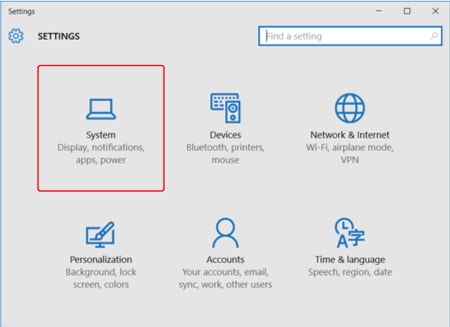
3. Click [System] on the displayed screen.
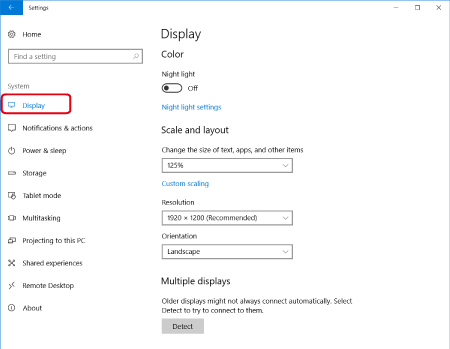
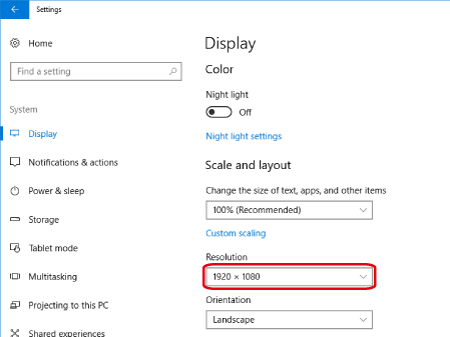
4. Select [Display] from the list on the left of the screen.
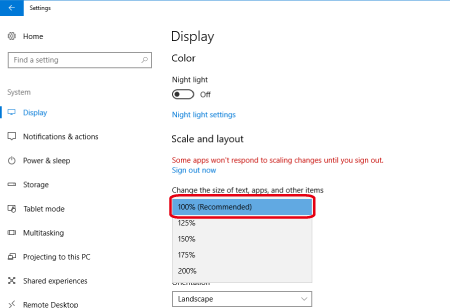
5. Check the size of text on the screen.
If the size is not set to [100% (Recommended)], select [100% (Recommended)], and then click [Sign out now].
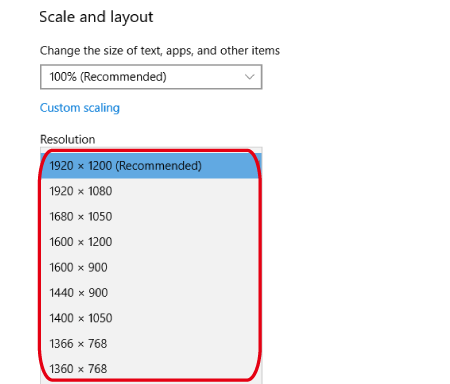
6. Adjust the screen resolution.
- Select [1024×720] or larger from the list that appears, and then click [Apply].
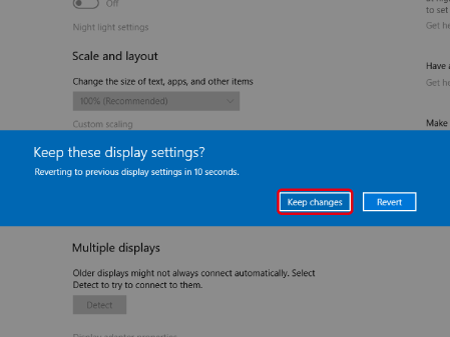
7. To implement the new resolution, click [Keep changes] on the below screen.
This concludes the procedure for changing the resolution and size settings.
 ) > [Control Panel].

 ) and then click [Apply] (
  ).
).



 ) on the bottom left of the screen, and then select [Control Panel].

 ) and then click [Apply] (
 ).
).




 ) on the bottom left of the screen.