21-Mar-2013
8201798700

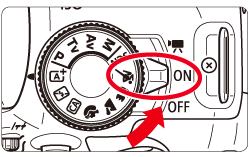
 ><
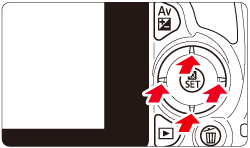
><
 >: Cross keys / <
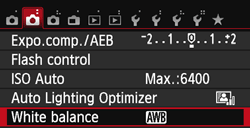
 >: Shooting tab 2 / <
 >: Setting button


 > keys to select the [
  ] tab. Press the <
 > keys to select [White balance], then press <
 >.
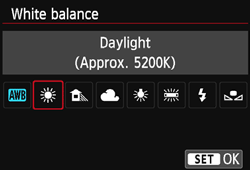
>.


 > to select to the desired style, then press <
 >.
>.
 >(Sunlight), <
  >(Shade), <
  >(Cloudy), <
  >(tungsten light), <
  >(white fluorescent light) is the respective color temperature.
 >(Custom White Balance) enables you to manually set the white balance for a specific light source for better accuracy. Do this procedure under the actual light source to be used. For more information on registering custom white balance, please refer to the instruction manual that came with your camera.