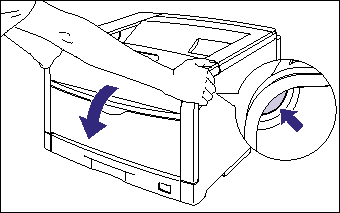
1. Open the front cover.
While pressing the lever on the right side of the front cover, open the front cover toward you.
2. Tilt the fixing unit toward you.
While pressing the green lock release buttons (A) on the left and right side of the fixing unit (1), hold the tabs (B) and tilt the fixing unit toward you (2) as shown in the figure.
3. Open the top cover.
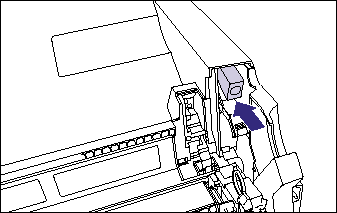
Press the blue lock release button of the top cover.
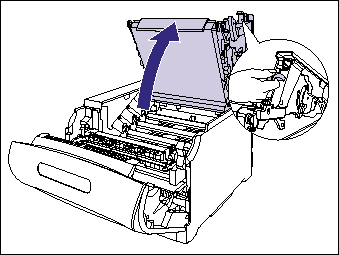
While holding the lever of the top cover, open the top cover.
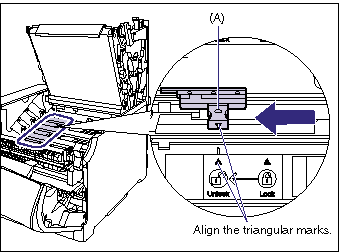
4. Slide the blue lock release lever (A) of the drum cartridge to be replaced to the position of "

" to release the lock of the drum cartridge.
Slide the lock release lever until the triangular mark on the lock release lever aligns with the triangular mark on the label.
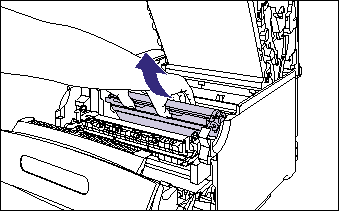
5. Remove all the drum cartridges.
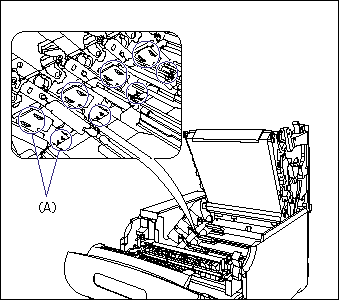
Remove the drum cartridge by holding the blue tab (A) as shown in the figure.
6. Take the drum cartridge out of the package, and then take it out of the protective bag.
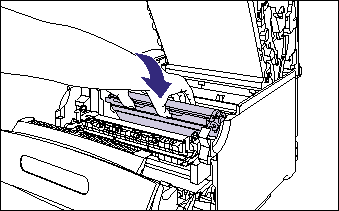
7. Check inside the printer.
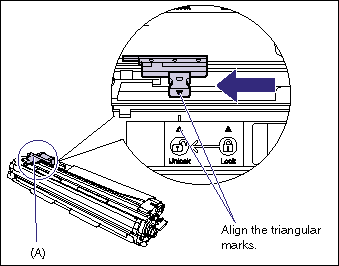
8. Before installing the drum cartridge, align the triangular mark on the lock release lever (A) with the triangular mark of "

" on the label as shown in the figure.
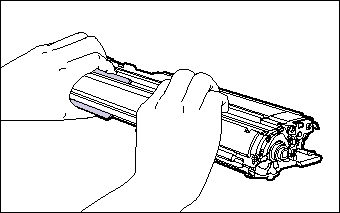
When installing the drum cartridge, hold the blue tabs as shown in the figure.
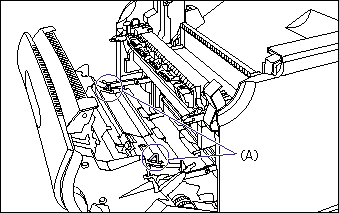
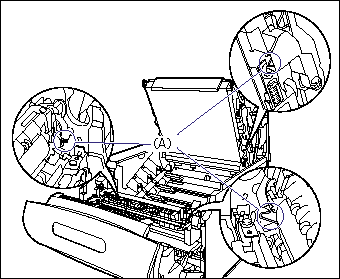
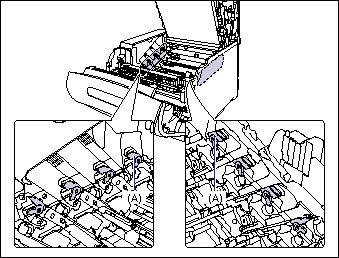
9. Make sure that the levers (A) near the drum cartridge guides on the both sides are in the proper position as shown in the figure.
If the levers are not in the proper position, the drum cartridges cannot be installed. Raise the levers to the proper position as shown in the figure.
10. Install the drum cartridge in the printer.
Insert the drum cartridge firmly until it touches the back of the printer.
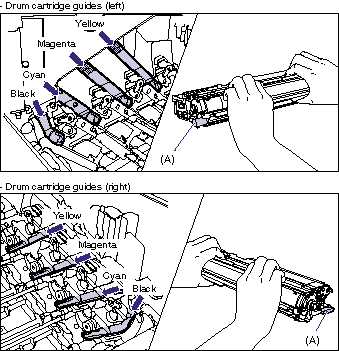
Insert the projections (A) on each side of the drum cartridge into the drum cartridge guides as shown in the figure.
11. Make sure that the levers near the drum cartridge guides on the both sides are in the proper position as shown in the figure.
Make sure that the levers on the both sides are in the proper position. If not, move the levers to the proper position manually.
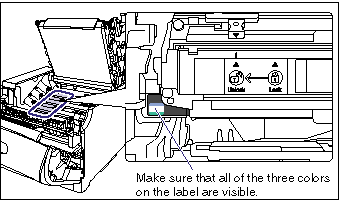
12. Make sure that the labels on the projections of the drum cartridge are visible.
If you cannot see any of the three colors on the label from the front, take out the drum cartridge once, turn the projection (A) in the direction of the arrow until it clicks and stops, and then reinstall the cartridge.
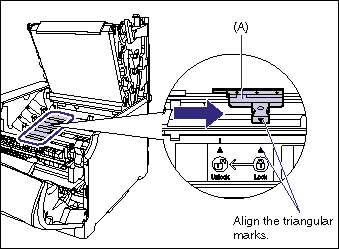
13. Slide the blue lock release lever (A) to the position of "

" to lock the drum cartridge.
Slide the lock release lever until the triangular mark on the lock release lever aligns with the triangular mark on the label.
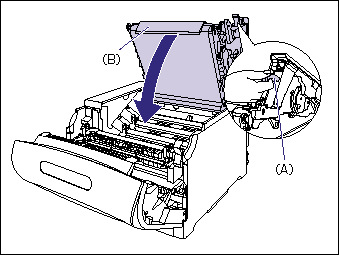
14. Close the top cover.
Close the top cover of the printer while holding it by the lever (A) gently.
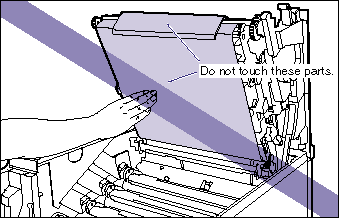
If you close the top cover forcefully, the ITB unit cover (B) may not move back to the original position, and this may result in damage to the printer.
By pressing the portion indicated "PUSH", close the top cover firmly until it cannot be pressed down any further as shown in the figure.
By holding the lever as shown in the figure, make sure that the top cover does not open.
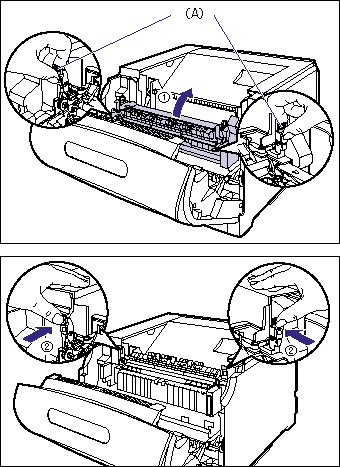
15. While holding the tabs (A), move the fixing unit back to its original position (1), and then press the tabs on the both sides as shown in the figure (2).
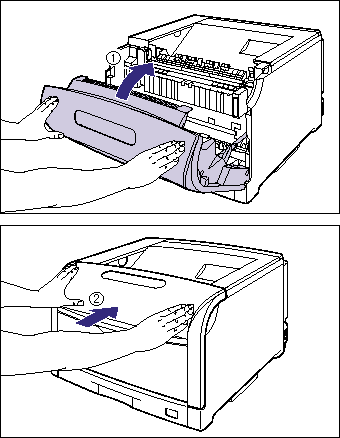
16. Close the front cover.
While supporting the front cover (1), push and close the front cover with both hands as shown in the figure (2).

 " to release the lock of the drum cartridge.


 " on the label as shown in the figure.



 " to lock the drum cartridge.