Solution
This answer explains how to important images, using Windows 7 as an example.
CAUTION
The exact procedure may vary depending on the version of Windows you are using.
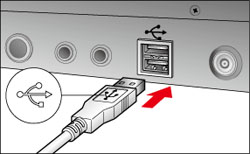
1. Connect the plug at the end of the interface cable supplied with the camera to the computer's USB port.
Use the interface cable supplied with the printer to connect the camera to the computer.
The location of the connect port will depend on your computer. Consult your computer's instruction manual for details.
2. Insert the plug at the other end of the interface cable to the camera's <DIGITAL> port.
3. Turn the camera's power <ON>.
4. Communication between the camera and the computer begins.
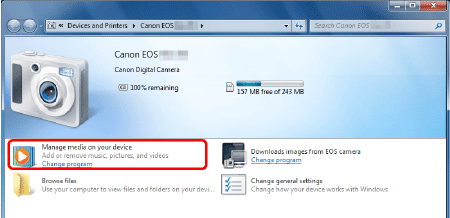
Click

] in the task bar to display the following screen.
5. Double-click [Import pictures and videos].
A screen like the one shown below is displayed.
6. Click [Import settings].
7. A screen like the one shown below is displayed.

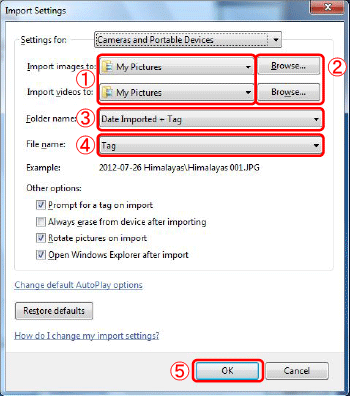
Set the save location for images. To change,

click [Browse].

Set the naming procedures for folders in which images are saved.

Set the naming procedures for saved files. Set each item as necessary.

Once you are satisfied with the settings, click [OK].
To create folders in [My Pictures] by the date the images were imported, leave the settings as they are, or change them to the settings shown in this image.
8. The following screen is displayed again.

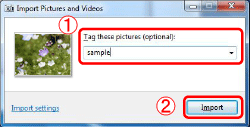
In the [Tag these pictures (optional)] field, you can enter a tag to be applied to the images. Pictures can also be imported with the field left blank.

Click [Import] to begin importing the images.
Tagging pictures lets you access and display multiple pictures by tag even if they are spread across multiple folders. For example, by tagging pictures of your holidays with the tag "Holiday", even if those pictures are saved in separate folders, you can simply search for pictures with the tag "Holiday" to display all of them together. Using tags can help you find the images you want faster and more easily. Refer to Windows Help for details.
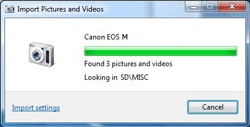
9. A screen like the one shown below is displayed, and image import begins.
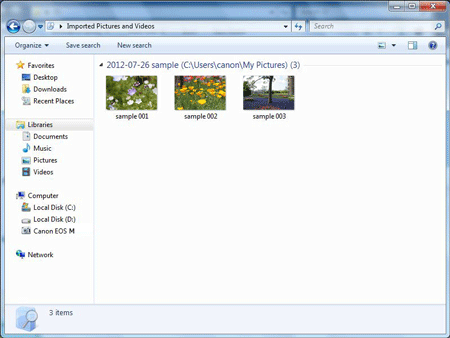
10. When all the images have been imported, a screen like the one shown below is displayed.
The image import process is now complete.

 ] in the task bar to display the following screen.

 Set the save location for images. To change,
  click [Browse].
 Set the naming procedures for folders in which images are saved.
 Set the naming procedures for saved files. Set each item as necessary.
 Once you are satisfied with the settings, click [OK].
 In the [Tag these pictures (optional)] field, you can enter a tag to be applied to the images. Pictures can also be imported with the field left blank.
 Click [Import] to begin importing the images.
