Solution
Time to Replace the Fuser Unit:
You can check the time to replace the fuser unit in the Printer Status Window. For details on the time to replace the fuser unit, see "Time to Replace the Fuser Unit" in Related Information at the end of this page.
Confirming the Included Parts:
Before replacing the fuser unit, make sure that all the following items are contained in the package. If any item is missing or damaged, please contact your local authorized Canon dealer.
(A): Fuser Unit
(B): Replacement Procedure Guide
How to Replace the Fuser Unit:
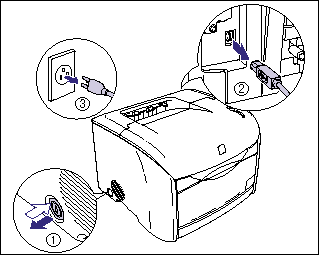
1. Press the power switch to turn the printer OFF (1), remove the USB cable (2), and disconnect the power plug from the AC power outlet (3).
2. Remove all the interface cables and the power cord from the printer.
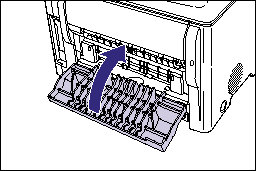
3. Close the sub-output tray if it is open.
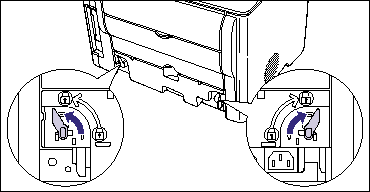
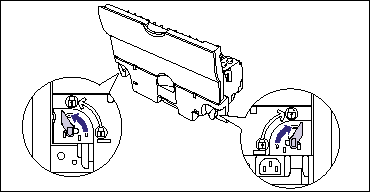
4. Turn the two lock release levers located on the back of the printer 90 degrees in the direction of the arrows to release the lock.
5. Holding the grip on the fuser unit, remove it.
6. Remove the tape from the protective bag and take out the new fuser unit.
To take a fuser unit out of the protective bag, put your hand into the protective bag and hold the grip on the fuser unit.
IMPORTANT
Be careful not to hold or touch areas that are not described in this procedure. This may result in damage to the fuser unit.
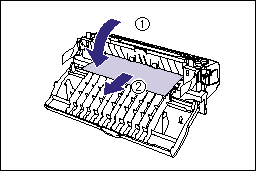
7. Open the sub-output tray (1) and remove any paper jammed in the fuser unit (2).
IMPORTANT
When you open the sub-output tray you will find paper sandwiched in the fuser unit and packing material attached to the left and right sides of the fuser unit. Make sure that you remove the paper before removing the packing material on the left and right sides. (-> Step 8)
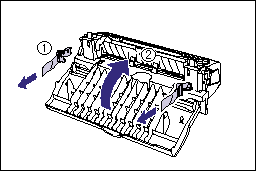
8. Pull out the tapes to remove the packing materials (1), then close the sub-output tray (2).
9. Make sure that the lock release levers are in the release position.
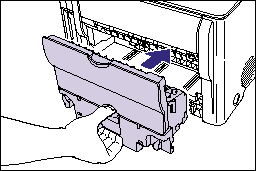
10. Hold the grip on the fuser unit and push it into the printer firmly.
Push the fuser unit into the printer firmly until the left and right sides of the fuser unit are flush with the rear side of the printer.
11. Lock the fuser unit by turning the two lock release levers 90 degrees in the directions of the arrows.
12. Connect the interface cables except for the USB cable, and connect the power cord.
13. Plug the power plug into an AC power outlet and connect the USB cable.

