Solution
Before you install the software, be sure to:
- Confirm the machine is not connected to your computer.
- Turn on the machine.
- Quit any Windows application running on your computer.
IMPORTANT
If you are using Windows 2000/XP/Server 2003, be sure to log on as a member of Administrators. The full control access right is necessary for the installation of the drivers.
NOTE
a. Use of a cable 3 m long or less is recommended.
b. The screen shots shown are from Windows XP.

To Use the Machine as a Local Printer
1. Insert the CD-ROM into your CD-ROM drive.
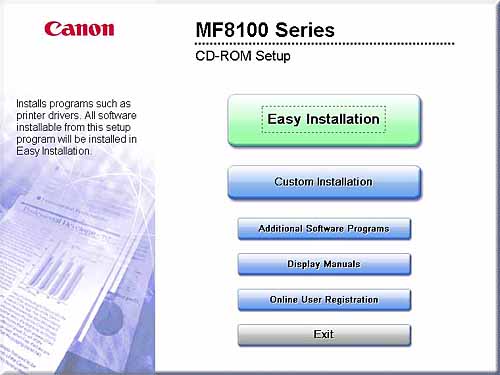
The [MF8110 Series CD-ROM Setup] screen appears.
Install the software following steps 1, 2 and 3 in the [Install Drivers] screen.
If the [MF8110 Series CD-ROM Setup] screen is not displayed, on the Windows desktop, click [start], then click [My Computer] (Windows 98/Me/2000: double-click [My Computer]). Open the CD-ROM icon and double-click [Minst (Minst.exe)].
If you are installing from a copy saved on a network or hard disk, double-click [Minst (Minst.exe)] in the copy.

Step 1 Install the MF Drivers (USB Connection)
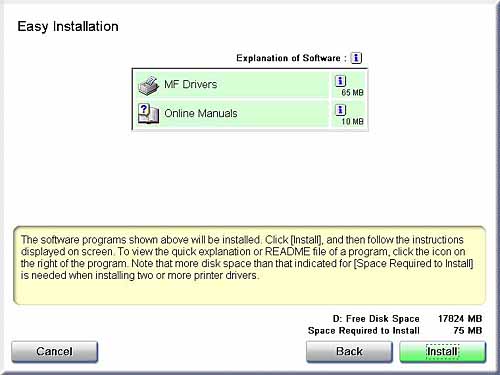
1. Click [Easy Installation].
NOTE
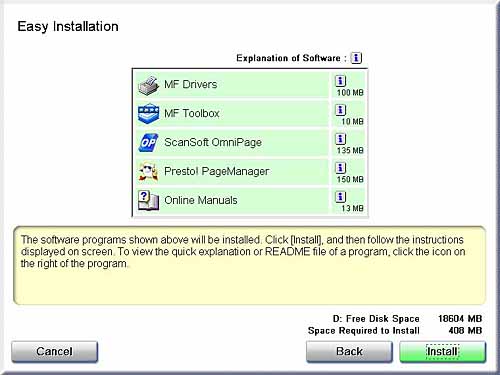
When you select [Easy Installation], Printer Driver and Online Manuals will be installed. If you do not want to install both items, select [Custom Installation].
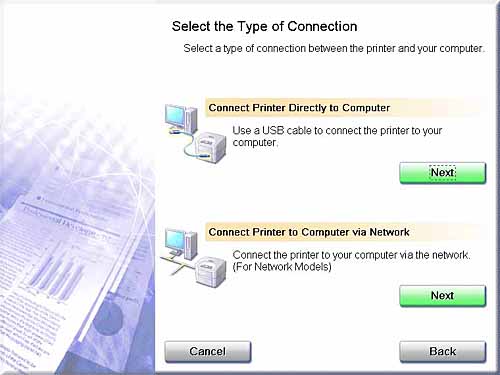
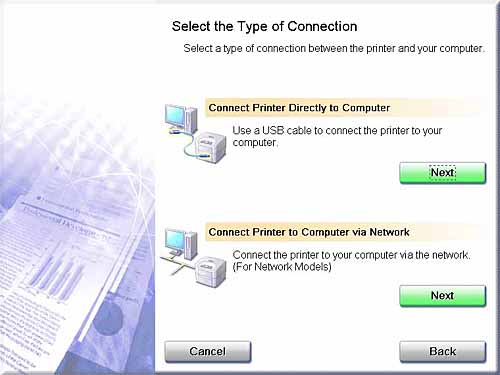
2. Click [Next] under [Connect Printer Directly to Computer].
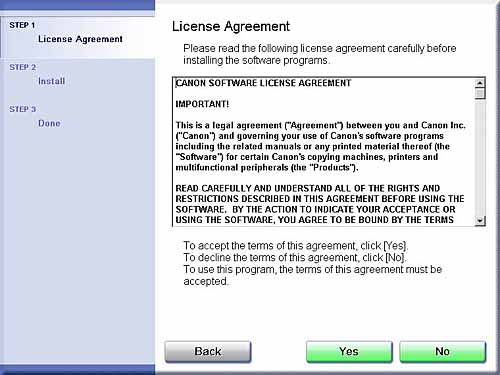
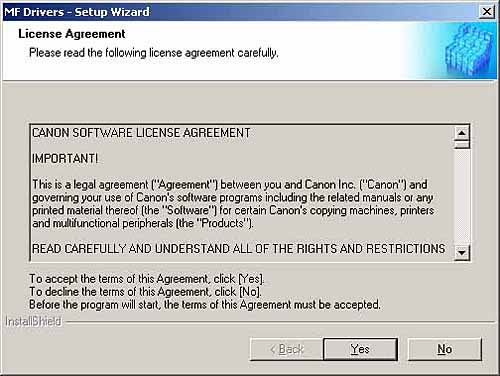
4. Read the contents of the [License Agreement] and click [Yes].
5. Read the contents of the [License Agreement] and click [Yes].
The installation will start.
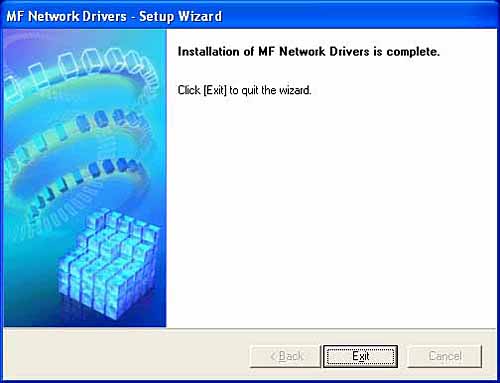
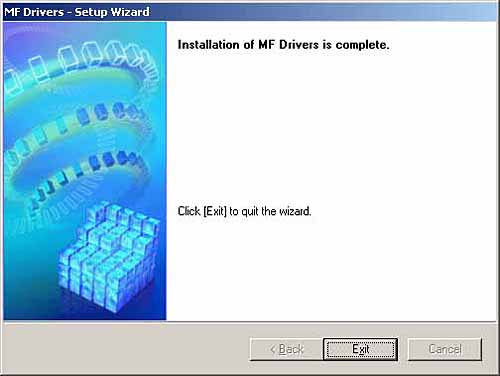
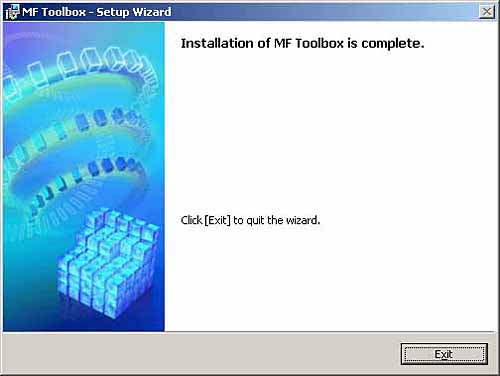
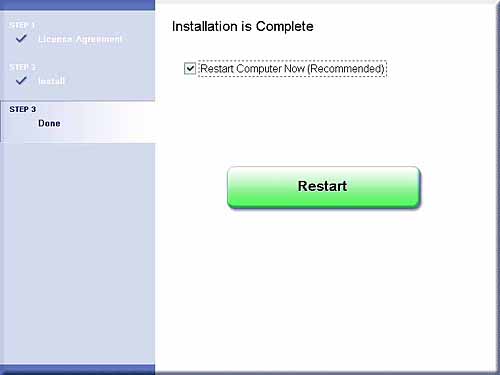
6. Click [Exit].
NOTE
If you are using Windows 98/Me, a message recommending you to restart your computer may appear. In this case, continue installing after restarting your computer
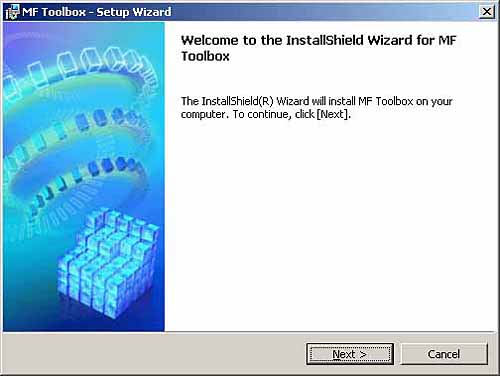
7. Click [Next] to setup the MF Toolbox.
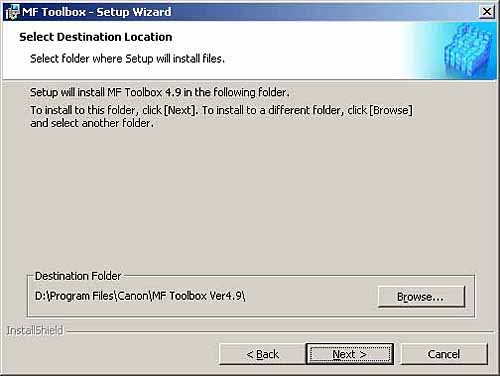
8. Check the destination folder to be installed and click [Next].
Click [Browse] to change the folder, and select the folder.
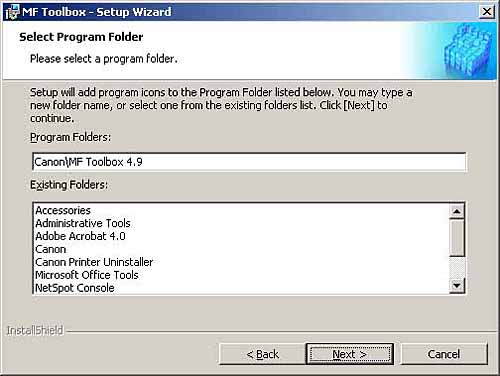
9. Confirm the folder to be installed and click [Next].
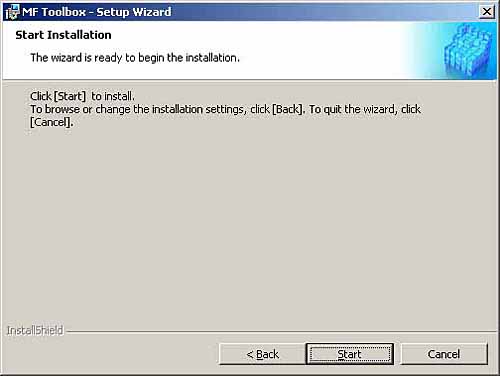
10. Click [Start].
The installation will start.
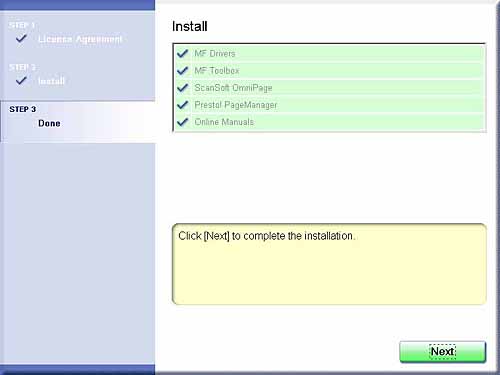
12. Confirm that a checkmark is marked on [MF Drivers], [MF Toolbox], [ScanSoft OmniPage], [Presto! PageManager] and [Online Manuals], and click [Next].

Step 2 Connect the USB Cable
1. Make sure that the machine is turned on.
Connect the USB cable after MF Toolbox installation.
2. Connect the USB cable to the machine and computer USB port.
When you connect the USB cable to the computer, the machine is automatically detected as a new hardware. Wait for a while as your computer performs various settings.
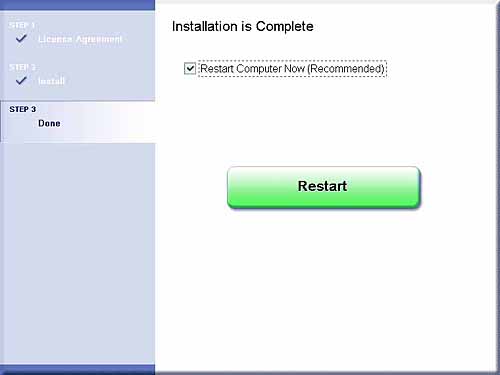
Depending on your computer, a message may display asking you to restart your computer.
After restarting your computer, wait for a while for your computer to continue performing various settings.

To Use the Machine as a Network Printer (Network Connection)
IMPORTANT
The machine needs to be restarted for the specified settings to become effective. To restart the machine, disconnect the power cord, wait for at least 10 seconds, and connect the power cord again.
NOTE
For the values of the network settings, consult your network administrator or internet service provider (ISP).

Step 1 Specifying Network Settings
1. Press [Menu], [Left cursor] or [Right cursor] to select [6.NETWORK SETTINGS] on the LCD, and then press [OK].
2. Press [Left cursor] or [Right cursor] to select [1.LAN SETTINGS], and then press [OK].
3. Press [Left cursor] or [Right cursor] to select [1.IP ADDRESS AUTO.], and then press [OK].
- To obtain an IP address automatically (dynamic allocation):
4. Press [Left cursor] or [Right cursor] to select [ON], and then press [OK].
5. Press [Left cursor] or [Right cursor] to select [1.DHCP], [2.BOOTP], or [3.RARP], and then press [OK].
6. Press [Stop/Reset] to return to the standby display.
7. Restart the machine by disconnecting the power cord, and then reconnecting it.
- To specify an IP address manually (static allocation):
4. Press [Left cursor] or [Right cursor] to select [OFF], and then press [OK].
5. Press [Left cursor] or [Right cursor] to select [2.IP ADDRESS], and then press [OK].
6. Enter an IP address of the machine using the numeric keys, and then press [OK].
7. Press [Left cursor] or [Right cursor] to select [3.SUBNET MASK], and then press [OK].
8. Enter the subnet mask using the numeric keys, and then press [OK].
9. Press [Left cursor] or [Right cursor] to select [4.DEFAULT GATEWAY], and then press [OK].
10. Enter the default gateway address using the numeric keys, and then press [OK].
11. Press [Stop/Reset] to return to the standby display.
12. Restart the machine by disconnecting the power cord, and then reconnecting it.

Step 2 Connecting the Machine to a Network
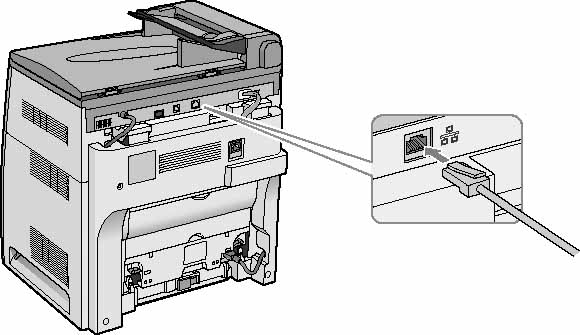
Connect a Category 5 rated (Cat 5) twisted-pair LAN cable to the 100Base-TX/10Base-T port on the back of the machine. Connect the other end of the cable to a network router or a hub.

Step 3 Checking Network Settings
1. Press [Menu], [Left cursor] or [Right cursor] to select [6.NETWORK SETTINGS] on the LCD, and then press [OK].
2. Press [Left cursor] or [Right cursor] to select [2.VIEW IP ADDRESS], and then press [OK].
3. Press [Left cursor] or [Right cursor] to select the desired settings, and then press [OK].
4. Press [Stop/Reset] to return to the standby display.

Step 4 Install the MF Network Drivers (Network Connection)
NOTE
For Windows 2000/XP/Server 2003, log on as Administrator to install the software.
1. Insert the CD-ROM into your CD-ROM drive.
The [MF8100 Series CD-ROM Setup] screen appears.
Install the software following steps in the [Install Drivers] screen.
2. Click [Easy Installation].
3. Click [Next] under the [Connect Printer to Computer via Network].
5. [License Agreement] screen appears, then click [Yes].
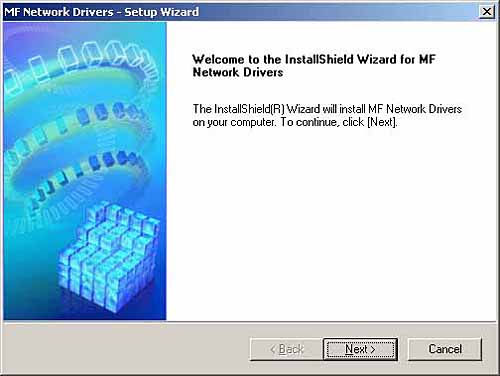
6. Click [Next] on the Setup Wizard screen.
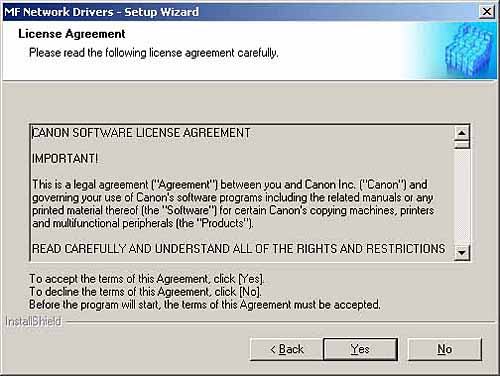
7. Read the contents of the [License Agreement], then click [Yes].
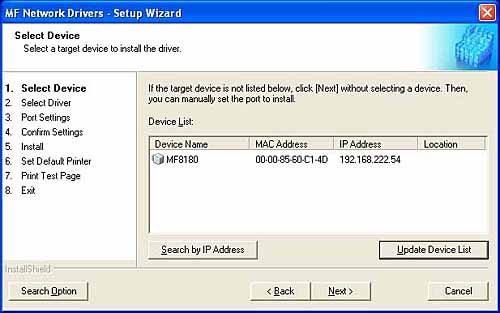
8. Select the target machine in the Device List and click [Next].
NOTE
If the target machine is not listed in the Device List, click [Search by IP Address] and enter the IP address, and then click [OK].
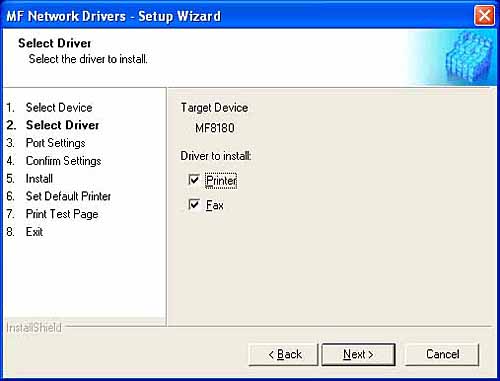
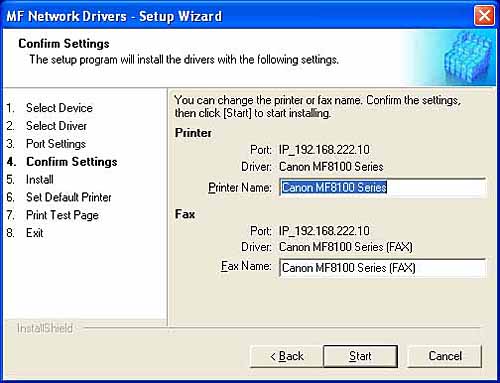
9. Select the driver(s) to install and click [Next].
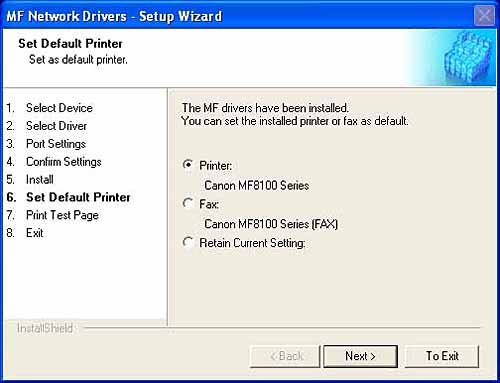
11. Select the default printer or fax and click [Next].
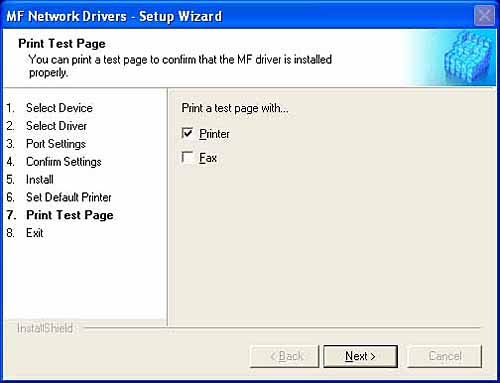
12. Select the driver type (Printer and/or Fax) and click [Next].
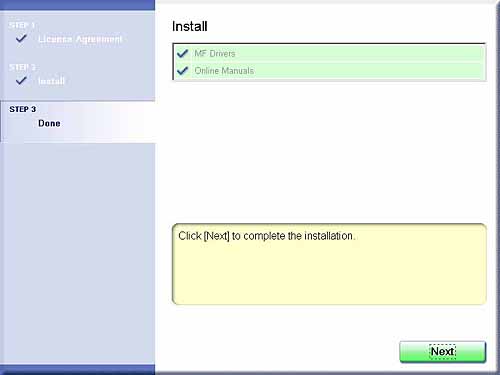
14. Confirm that a check mark is marked on [MF Drivers] and [Online Manuals] and Click [Next].
 To Use the Machine as a Local Printer
 Step 1 Install the MF Drivers (USB Connection)
 Step 2 Connect the USB Cable
 To Use the Machine as a Network Printer (Network Connection)
 Step 1 Specifying Network Settings


 Step 2 Connecting the Machine to a Network
 Step 3 Checking Network Settings


 Step 4 Install the MF Network Drivers (Network Connection)
