Solution

Loading Paper in the paper cassette
1. Open the front panel of the paper cassette.
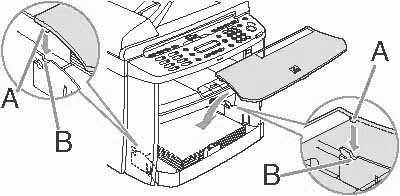
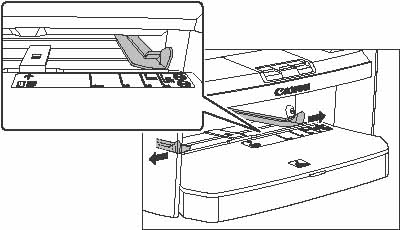
2. Slide the paper guide rail (A), and then pinch and slide the side paper guides (B) to match the size of paper
(A): Paper guide rail
(B): Side paper guides
3. Fan the paper stack and even the edges.
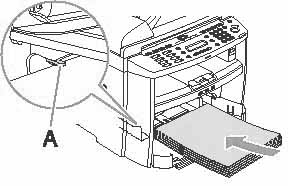
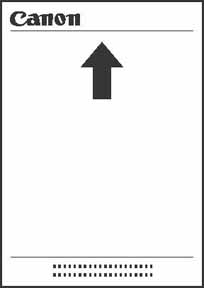
4. Load the paper into the paper cassette with the print side up (see paper ream label for print side as described or indicated by an arrow). Make sure the paper stack sits below the small fin (A) on the side paper guide.
(A): Small fin
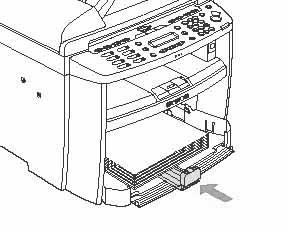
5. Adjust the paper guide rail to match the size of paper.
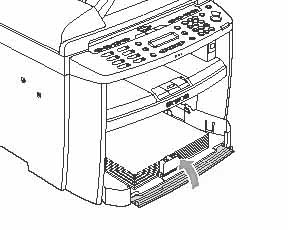
6. Close the front panel of the paper cassette.
7. Connect the edge of dust cover (A) and the edge of paper cassette (B).
(A): Dust cover
(B): Edge of paper cassette
NOTE
The default paper size/type setting is [A4] and [PLAIN PAPER]. When you load other size and/or type of paper, change the paper size/type setting in [Additional Functions].
Loading Paper in the Multi-Purpose Tray
Load paper one at a time in the multi-purpose tray.
NOTE
a. The paper in the multi-purpose tray has priority to that in the paper cassette.
b. The recommended envelopes are COM10, MONARCH, DL, and ISO-C5. Using other envelopes may affect the quality of the printout.
c. Make sure to set the correct paper size in the printer driver.
d. When printing received documents, it is possible to feed paper only from the paper cassette. If paper is loaded into the multi-purpose tray, [PAPER IN MP TRAY/REMOVE PAPER] appears.
1. Spread the paper guides a little wider than the actual paper width.
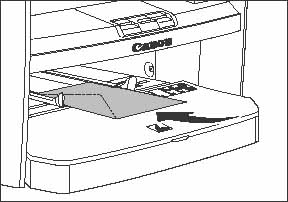
2. When setting paper, gently insert the paper into the multi-purpose tray with the print side up.
NOTE
When you load paper with a logo, position the paper with the print side up (logo side) and insert it so that the top of the paper feeds first in the multi-purpose tray.
When setting an envelope, gently insert the envelope into the multi-purpose tray with the print side up and the right edge (i.e., closer to the stamp) first.
3. Slide the paper guides so that they fit to both sides of the paper.
NOTE
If the paper guides are not adjusted correctly for the size of the paper, the quality of your printouts may be adversely affected.
4. Specify the size and the type of the paper you load.