How to Uninstall USB Class Driver/How to Install CARPS Driver (FAX-L380)
Solution
1. Make sure the printer is connected to your computer using a USB cable and the printer is turned on.
2. For Windows 98/Me/2000, open the [System] dialog box from the [Control Panel]. For Windows XP, click [Performance and Maintenance] in the [Control Panel], then click [See basic information about your computer] in the [Performance and Maintenance] folder. The [System Properties] dialog box appears.
3. For Windows 98/Me, select the [Device Manager] tab sheet, then double-click [Universal Serial Bus Controllers]. For Windows 2000/XP, select the [Hardware] tab sheet, click [Device Manager], then double-click [Universal Serial Bus Controllers].
4. Locate the USB class driver under [Universal Serial Bus Controllers]. Delete ONLY the USB class driver specified for your operating system. (If the USB class driver is displayed under [Other device], delete ONLY one of the following, depending on your operating system: [Canon FP-L170/MF350/L380/L398], [Canon CARPS USB Printer], or [Unknown].)
For Windows 98, select [Canon FP-L170/MF350/L380/L398] and click [Remove]. For Windows Me, select [Canon CARPS USB Printer] and click [Delete]. For Windows 2000/XP, select [USB Printing Support] or [Canon CARPS USB Printer], then uninstall from the [Action] menu.
IMPORTANT
Never delete other devices or device drivers. Windows may not operate properly.
5. Close the [Control Panel] and unplug the USB cable.
6. Restart Windows.
7. Place the CD-ROM into your CD-ROM drive.
The CD-ROM menu is displayed.
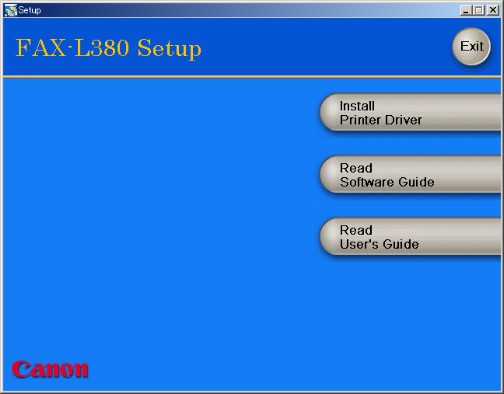
8. Click [Install Printer Driver].
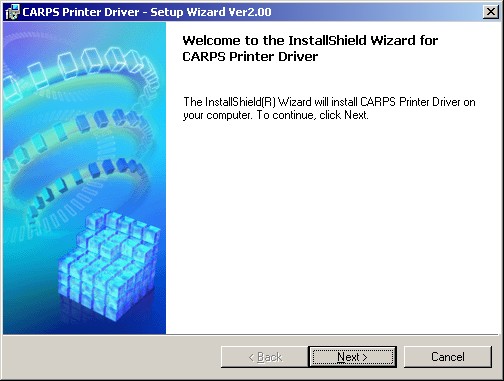
9. Click [Next] on the Setup Wizard dialog box.
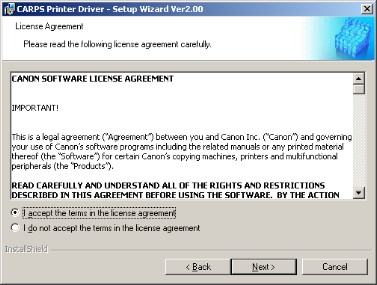
10. After confirming the contents of the [License Agreement] dialog box, select [I accept the terms in the license agreement], then click [Next].
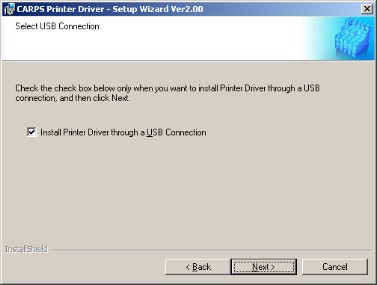
11. Confirm that [Install Printer Driver through a USB Connection] is selected, then click [Next].
NOTE
A message recommending you to restart your computer may appear under some operating systems. In this case, continue installing after restarting your computer.
12. Click [Yes] to continue the installation through the USB connection.

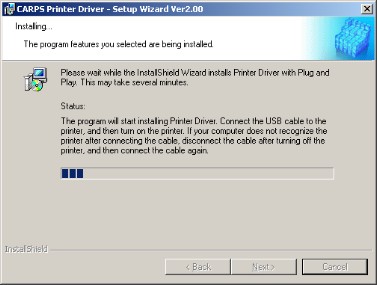
13. Connect the machine to your computer with the USB cable.
IMPORTANT
The USB cable must be connected to the port on your computer within 90 seconds after [Yes] in the [USB Connection] dialog box is clicked, otherwise the installation will not complete.
NOTE
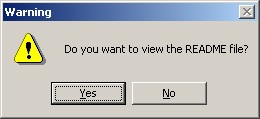
While the printer driver is being installed, the message asking you if you want to view the README file or not appears. If you want to view the README file now, click [Yes]. If not, click [No].
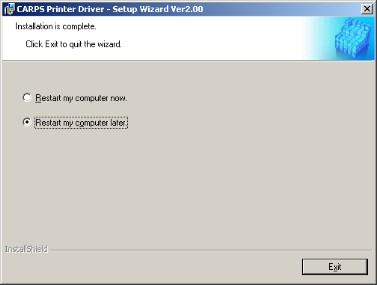
Select [Restart my computer now.] or [Restart my computer later.], then click [Exit].
