Solution
With your camera, you can edit out the first and last scenes of a movie in 1-sec. increments. You can select [Overwrite] to save and overwrite the original movie, or [New file] to save the movie as a new movie. This operation is carried on the movie playback screen.
1. Set the power switch to <ON>.
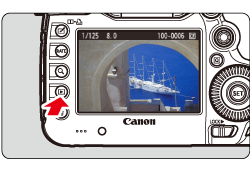
2. Press the <

> to display the image.
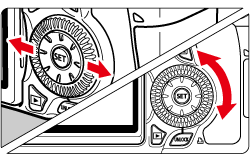
3. Turn the <Quick Control Dial> to select the image.
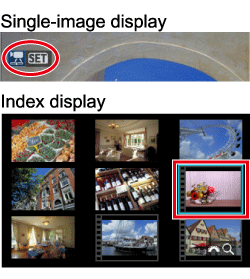
- With the single-image display, the [
 ] icon displayed on the upper left indicates a movie.
- On the index display, the perforations on the left edge of the image indicates a movie. As movies cannot be played on the index display, press the <SET> button to switch to the single-image display.
4. On the single-image display, press the <SET> button.
The movie playback panel will appear on the bottom.
5. Press the <Quick Control Dial> to select [

], then press the <SET> button.
The editing screen will be displayed.
6. Specify the parts to be edited out.
6-1. Turn the <Quick Control Dial> to select either [

] (Cut beginning) or [

] (Cut end), then press the <SET> button.
6-2. Tilt the <Multi-controller> to the left or right to see the previous or next frames. Holding it down will fast forward the frames. Turn the <Quick Control Dial> for frame-byframe playback.
- After deciding which part to edit out, press the <SET> button.
- The portion highlighted in blue on the top of the screen is what will remain.
7. Check the editing.
- Turn the <Quick Control Dial> to select [
 ], and then press the <SET> button to playback the portion highlighted in blue.
- To change the editing, go back to step 6.
- To cancel the editing, select [
 ] and press the <SET> button.
8. Turn the <Quick Control Dial> to select [

], then press the <SET> button to save the movie. The save screen will appear.
To save it as a new movie, select [New file]. Or to save it and overwrite the original movie file, select [Overwrite]. Then press the <SET> button.
NOTE
If the card does not have enough free space, [New file] will not be available.
 > to display the image.
 ] icon displayed on the upper left indicates a movie.
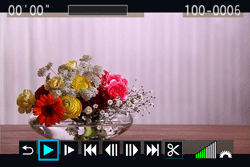
 ], then press the <SET> button.
 ] (Cut beginning) or [
  ] (Cut end), then press the <SET> button.
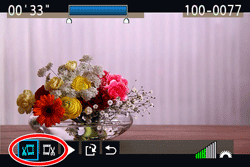

 ], and then press the <SET> button to playback the portion highlighted in blue.
  ] and press the <SET> button.
 ], then press the <SET> button to save the movie. The save screen will appear.