Solution
MF Drivers & MF Toolbox Installation
NOTE
- Connect the USB cable after the installation of software.
- Make sure that the power of the machine is turned ON when connecting the USB cable.
- MF driver and MF Toolbox for 64-bit operating systems may not be supplied depending on your country or region.
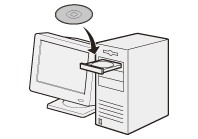
1. Insert the User Software CD-ROM.
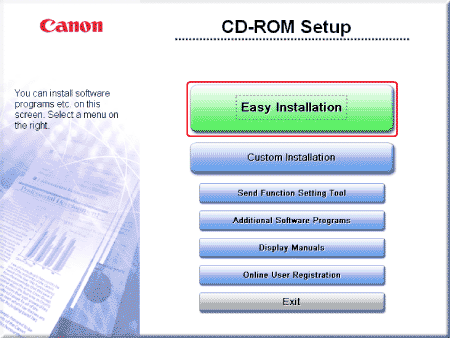
2. Click [Easy Installation].
NOTE
- The options to be displayed differ depending on your country or region.
- If the CD-ROM Setup screen above is not displayed automatically.
- Windows XP: Click [start] on the Windows task bar → [My Computer] → CD-ROM icon.
- Windows 2000: Double-click [My Computer] on the Windows desktop → CD-ROM icon.
- Windows Server 2003: Click [Start] on the Windows task bar → [My Computer] → CD-ROM icon.
- Windows Vista/Server 2008/7: Click [Start] on the Windows task bar → [Computer] → CD-ROM icon.
Right-click the CD-ROM icon and select [Open], then double-click [MInst] ([MInst.exe]).
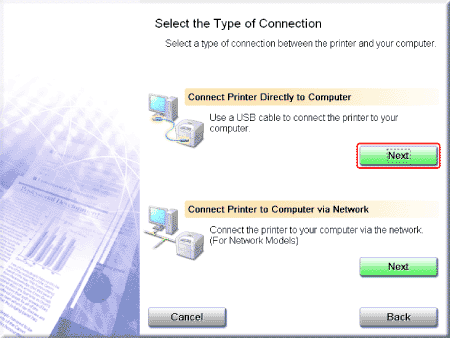
3. Click [Next] in [Connect Printer Directly to Computer]. (Windows 2000 Professional/XP/Vista/7 Only)
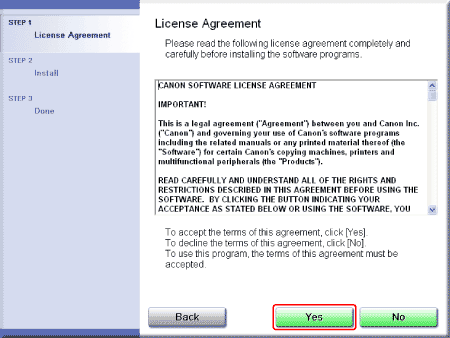
5. Read the contents of License Agreement, and then click [Yes].
NOTE
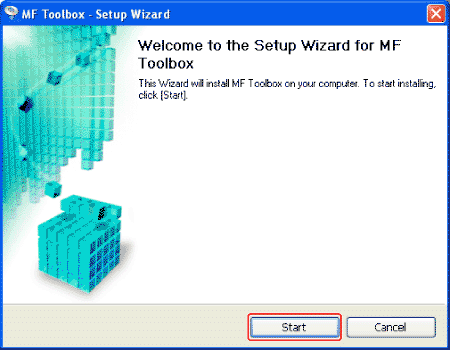
Next, installation of the MF Toolbox starts.
In Windows Server/Server 2003/2008, MF Toolbox is not installed. Proceed to Step 10.
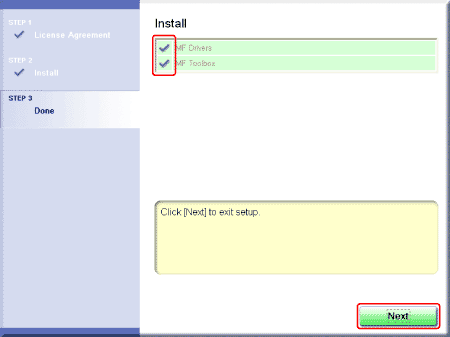
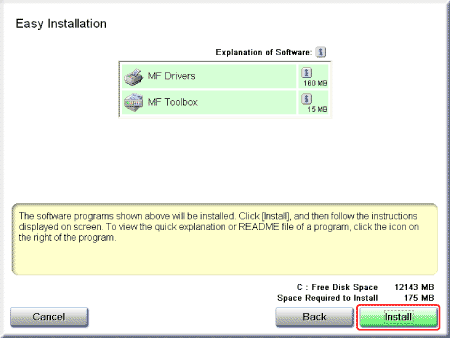
10. Check [

] is selected in [Install], and then click [Next].
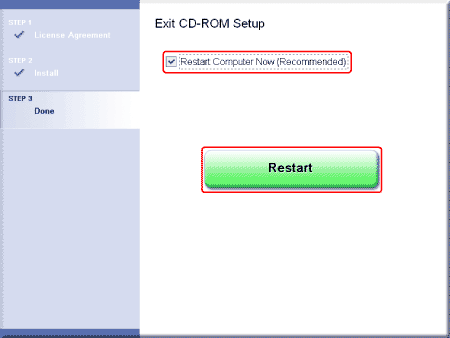
11. Restart your computer.
11-1. Select the [Restart Computer Now (Recommended)] check box.
11-2. Click [Restart].
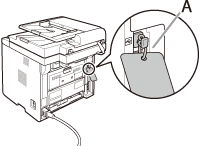
12. The machine has a cap (A) that covers the USB port on the back of the machine. Remove the cap (A) by pulling the string.
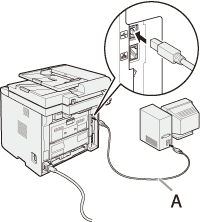
13. After restarting your computer, connect the machine and your computer with a USB cable (A).
NOTE
Depending on the operating system you use, the dialog box to inform you that new hardware is detected may appear. Follow the on-screen instruction to complete the installation.
14. Remove the User Software CD-ROM. Installation is complete. Go to "Check Installation," in this section.
Verify that the driver has been installed successfully and that the machine has been set as the default printer.
NOTE
If the name of the machine is selected on the [Printer] screen from an application, it is set as the default printer.
1. Open the folder for printers, then verify that the corresponding printer driver icon is displayed.
Windows XP:
- Click [start] on the Windows task bar →[Printers and Faxes].
Windows 2000:
- Click [Start] on the Windows task bar →[Settings] →[Printers].
Windows Server 2003:
- Click [Start] on the Windows task bar →[Printers and Faxes].
Windows Vista:
- Click [Start] on the Windows task bar →[Control Panel] →[Printers].
Windows Server 2008/7:
- Click [Start] on the Windows task bar →[Devices and Printers].
UFRII LT Printer driver
 | Fax driver
 |
2. Set your machine as the default printer.
Select the printer icon for this machine, then select [Set as Default Printer] from the [File] menu.
3. Open [Scanners and Cameras] or [Scanners and Cameras Properties], then verify that the corresponding scanner driver icon is displayed.
Windows s XP:
Click [start] on the Windows task bar →[Control Panel] →[Printers and Other Hardware] →[Scanners and Cameras].
Windows 2000:
Click [Start] on the Windows task bar →[Settings] →[Control Panel] → double-click [Scanners and Cameras].
Windows Vista:
Click [Start] on the Windows task bar →[Control Panel] →[Hardware and Sound] →[Scanners and Cameras].
Windows 7:
Enter "scanner" in [Search programs and files] under the [Start] menu, click [View scanners and cameras].
Scanner driver

4. Verify that the [Canon MF Toolbox 4.9] icon is on the Windows desktop.
If the [Canon MF Toolbox 4.9] icon is displayed on the Windows desktop, installation of the MF Toolbox 4.9 was successful.
MF Toolbox




 ] is selected in [Install], and then click [Next].