Setting the Date and Time
02-Feb-2010
8200710300
Solution
This section describes how to make the date and time settings on the camera.
CAUTION
- The date and time settings are recorded on images captured with the camera.
When you turn on the camera for the first time after purchase, the [Date/time] settings screen appears.
1. Press the <Power> button on the camera.

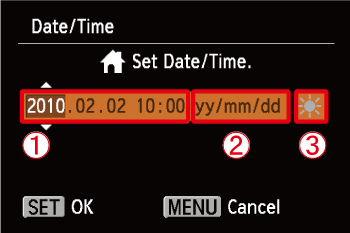
2. The following screen appears.

Operate the <directional buttons> left or right to select an option.
Next, operate the <directional buttons> up or down to make the following settings.
 Set the year, month, date, and time.
 Change the year, month, and date.
 Set the daylight saving time (one hour is added to the current time).
After the settings are completed, press the <FUNC./SET> ( ) button.
 ) button.
1. Press the <Power> button on the camera.

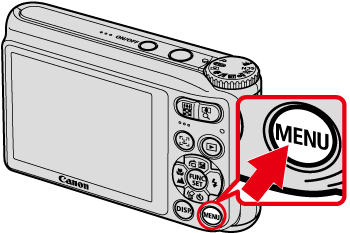
2. Press the <MENU> ( ) button.
 ) button.
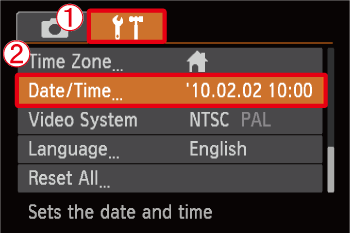
3. The following screen appears.

Operate the <directional buttons> left or right to select  [Set up] (
 ) tab.
 [Set up] (
 ) tab.
Operate the <directional buttons> up or down to select  [Date/time].
 [Date/time].
Press the <FUNC./SET> ( ) button.
 ) button.
4. The following screen appears.

Operate the <directional buttons> left or right to select an option.
Next, operate the <directional buttons> up or down to make the following settings.
 Set the year, month, date, and time.
 Change the year, month, and date.
 Set the daylight saving time (one hour is added to the current time).
After the settings are completed, press the <FUNC./SET> ( ) button.
 ) button.
NOTE
- If you do not set the date and time, the [Date/time] settings screen appears every time you turn on the camera.