Uninstalling the USB Class Driver
10-Jan-2012
8200514000
Solution
1. Confirm whether the computer and printer are correctly connected by a USB cable, and whether the printer is switched on.
2. From the [Start] menu, select [Settings] - [Control Panel], and double-click the [System] icon.
The [System Properties] dialog box is displayed.
NOTE
- For Windows XP/Server 2003, from the [Start] menu, select [Control Panel] - [Performance and Maintenance], and double-click the [System] icon.
- For Windows Vista/Server 2008, click [
 ] (Start) -[Control Panel] - [System and Maintenance] - [Device Manager]. If the [User Account Control] dialog box is displayed, perform the following operation and proceed to step 4.
- If you have logged on using an administrator account, click [Continue].
- If you have logged on as a user, enter the administrator account password and click [OK].
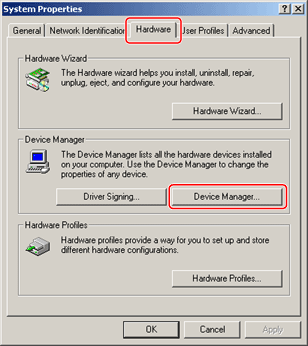
3. Click the [Hardware] tab, then click [Device Manager].

4. Delete the USB class drivers displayed under [Universal Serial Bus controllers].
Select the name of the printer you are using, then click [Delete].
IMPORTANT
If USB class drivers are displayed under [Other Devices], they have not been installed correctly. Select the USB class drivers and delete them according to the operating system you are using.
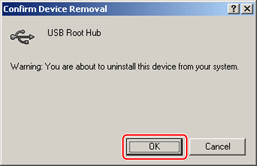
5. If the [Confirm Device Removal] (in Windows Vista/Server 2008, [Confirm Device Uninstall]) dialog box is displayed, click [OK].

6. Click [Close].
7. Close [Control Panel].
8. Remove the USB cable from the computer and restart Windows.