Solution
Setting the Date and Time
You will need to set the date and time of the camcorder before you can start using it. The [DATE/TIME] screen will appear automatically when the camcorder's clock is not set.
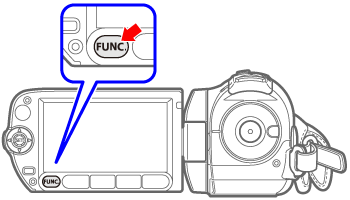
1. Press

.
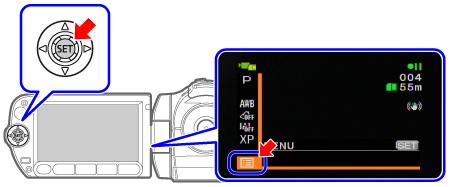
2. Select the icon [

menu ] and press

to open the setup menus.
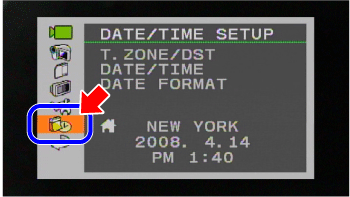
3. Select [ DATE/TIME SETUP ] and press

.
4. Select [ DATE/TIME ] and press

.
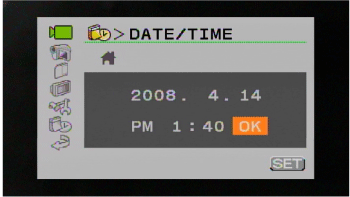
When the [ DATE/TIME ] screen appears, the year will be displayed in orange and indicated with up/down arrows.
5. Change the year and move to the month.
Change the rest of the fields (month, day, hour and minutes) in the same way.
6. Select [ OK ] and press

to start the clock and close the setup screen.
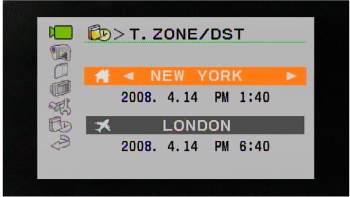
Change the time zone to match your location. The default setting is New York.
1. Press

.
2. Select the [

menu ] icon and press

to open the setup menus.
3. Select [ DATE/TIME SETUP ] and press

.
4. Select [ T.ZONE/DST ] and press

.
5. Select [

your local time zone ] or [

Local time at your destination* ].
Select time zone and press

.
6. Press

to close the menu.
* To adjust for daylight saving time, select the area name marked with a

.
 .
.
 menu ] and press
  to open the setup menus.
 .
.
 .
.
 to start the clock and close the setup screen.
 .
. menu ] icon and press
  to open the setup menus.
 .
. .
. your local time zone ] or [
  Local time at your destination* ].
 .
.
 to close the menu.
 .
.