Paper Jams
Solution
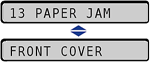
When a paper jam occurs during printing for some reason, the printer beeps, displaying the message <13 PAPER JAM> in the display. When a paper jam occurs, remove the jammed paper using the following procedure, and then resume the job. If the message that indicates the paper jam does not disappear even after removing the jammed paper following the procedure, there is a possibility that torn pieces of paper are still left inside the printer. Inspect each part of the printer again, and completely remove all pieces of jammed paper.
The message that appears in the display shows the location where the paper jam occurred.

| Paper Jam Area | Message | |
 | Output Area | <OUTPUT AREA> |
 | Inside the front cover | <FRONT COVER> |
 | Inside the front cover (Duplex print transport area) | <DUPLEX UNIT> |
 | Cassette 1 | <CASS.1 AREA> |
 | Cassette 2 (Only when the paper feeder is installed) | <CASS.2 AREA> |
 | Cassette 3 (Only when the paper feeder is installed) | <CASS.3 AREA> |
 | Cassette 4 (Only when the paper feeder is installed) | <CASS.4 AREA> |
Remove the jammed paper using the following procedure.
IMPORTANT
The error message may remain if jammed paper is removed without opening the front cover. In this case, open and close the front cover once.
NOTE
The illustrations of the printer on the left of each step indicate paper jam areas where the operation described in the step is required.
1. Confirm all the messages that appear in the display.
Messages appear one at a time. Confirm all of them.
As the messages disappear when the cover is open, take a note of them if required.
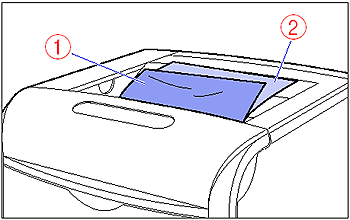
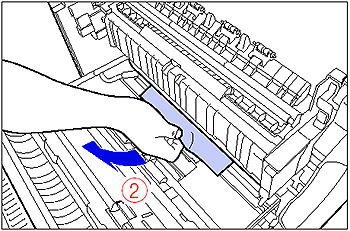
2. Check the output tray, then remove all the jammed paper (1) and output paper (2).
3. If you are using the multi-purpose tray, remove any paper jammed in the multi-purpose tray.

4. If you are using the multi-purpose tray, close it.

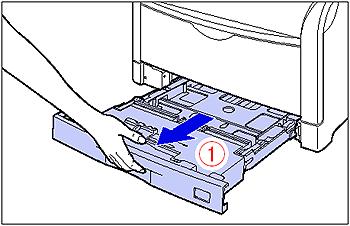
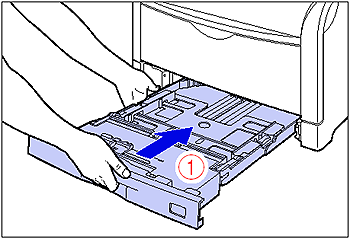
5. Pull out the paper cassette.
Pull the paper cassette out until it stops (1).
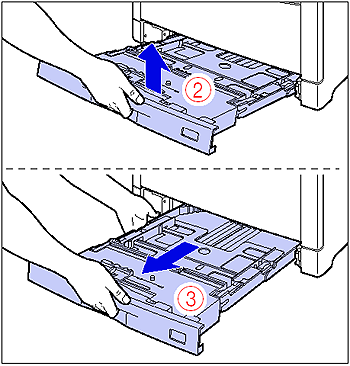
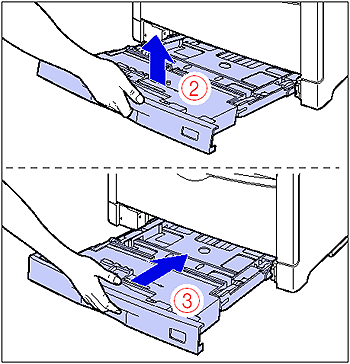
After lifting the paper cassette up a little (2), pull it out while supporting it with the other hand (3) as shown in the figures.
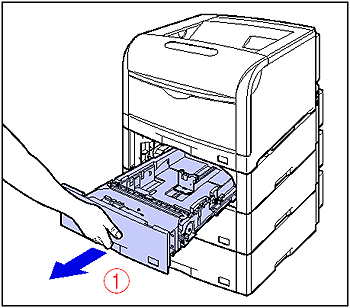
6. If the paper feeders are installed, pull all the paper cassettes out from the top.
Pull the paper cassette out until it stops (1).
After lifting the front of the paper cassette up a little (2), pull it out while supporting the cassette with your left hand until the handle (A) on the right side of the paper cassette appears completely (3).

While holding the paper cassette with both hands, pull it out completely (4) as shown in the figure.

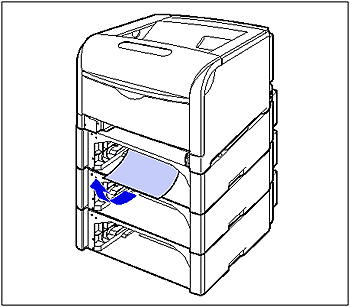
7. Remove any jammed paper while pushing it downward to some extent.
In case of the printer

In case of the paper feeder
8. Open the front cover.
While pressing the lever on the right side of the front cover, open the front cover toward you.

IMPORTANT
Before opening the front cover, make sure that the multi-purpose tray is closed.
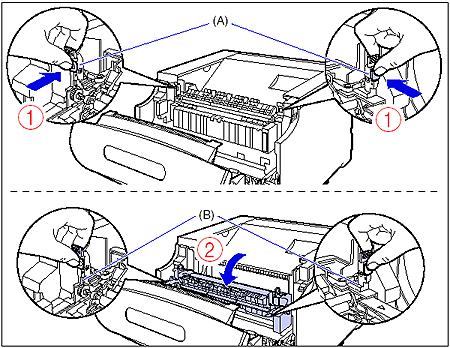
9. Tilt the fixing unit toward you.
While pressing the green lock release buttons (A) on the left and right side of the fixing unit (1), hold the tabs (B) and tilt the fixing unit toward you (2) as shown in the figure.
10. Remove any jammed paper from the front of the fixing unit.
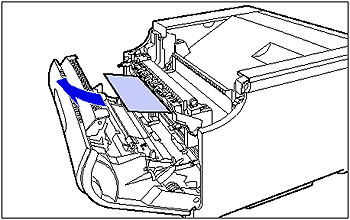
11. Remove any jammed paper from the rear of the fixing unit.

IMPORTANT
Remove the jammed paper slowly and forcefully to prevent the unfixed toner from scattering.
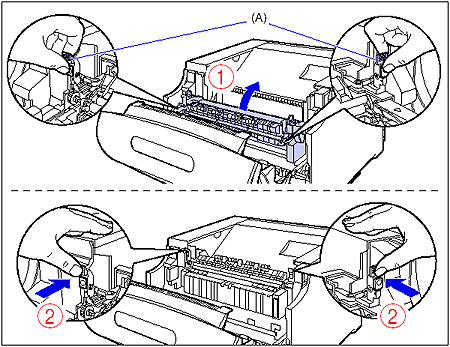
12. While holding the tabs (A), move the fixing unit back to its original position (1), and then press the tabs on the both sides as shown in the figure (2).
13. Remove any paper jammed under the fixing unit.
Turn the dial on the left of the fixing unit in the direction of the arrow to send any jammed paper (1) as shown in the figure.

Remove any jammed paper as shown in the figure (2).
IMPORTANT
As the paper may be jammed in the back of the printer, turn the dial sufficiently to send the paper.
14. If the paper jam occurred when performing 2-sided printing, open the cover of the duplex print transport area while holding it by the tab (A) inside the front cover as shown in the figure (1), and then remove any jammed paper (2).

15. Close the front cover.
While supporting the front cover (1), push and close the front cover with both hands as shown in the figure (2).

16. Set the paper cassette in the printer.
While holding the paper cassette with both hands, insert it until it stops (1) as shown in the figure.
After lifting the front of the paper cassette up a little (2), push the paper cassette into the printer firmly until the front side of the paper cassette is flush with the front surface of the printer (3).
17. If the paper feeders are installed, set all the paper cassettes in the paper feeders from the top.
While holding the paper cassette with both hands, push it to the position shown in the figure (1). Then, hold the front of the paper cassette with your right hand and push it until it stops (2).

After lifting the front of the paper cassette up a little (3), push the paper cassette into the printer firmly until the front side of the paper cassette is flush with the front surface of the paper feeder (4).

If the message that indicates the paper jam inside the front cover does not disappear even after removing the jammed paper following the procedure, there is a possibility that some paper still remains under the fixing unit. Following Step 14, turn the dial sufficiently to send the paper and remove it.
IMPORTANT
- Remove jammed paper while the power of the printer is ON. If the power is turned OFF, the data being printed will be deleted.
- Applying excess force may result in tearing paper or damaging the parts in the printer. When removing jammed paper, pull out the paper in the most appropriate direction, judging from the position of the paper.
- The paper cassette cannot be pulled out horizontally. If you try to pull it out forcefully, this may result in damage to the paper cassette.
- Because the paper cassette is heavy, hold it with your both hands securely.
- Place the removed paper cassette on an even and stable surface.
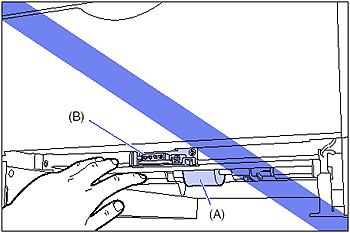
- Do not touch the paper feed roller (A) or switch (B) on the lower portion of the printer. This may result in damage to the printer or printer error.
- If paper is torn, be sure to find and remove any remaining pieces of paper.
- Do not place any paper or object on the output tray during printing, as this may result in paper jams.
NOTE
If no toner is on the removed paper, it may adhere to the paper to be printed next.