Solution
Using the Trimming Tool in Digital Photo Professional, you can trim and enlarge just the part of the image you need, or change the composition of an image so that an image shot horizontally looks as if it were shot vertically.
If you convert the trimmed image into a JPEG or TIFF image, it will be saved as a separate image.
This section describes how to trim an image using the Trimming Tool.
1. Start Digital Photo Professional and select an image to be trimmed.
2. From the [Tools] menu, select [Start Trimming tool].
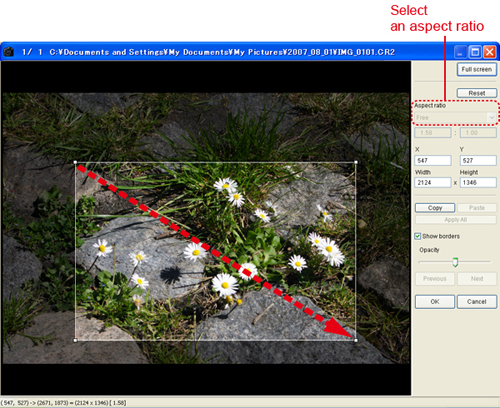
The trimming window appears.
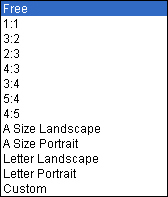
3. When the image has become clear, select an aspect ratio and drag the trimming range.
You can move the trimming range by dragging it. You can also enlarge or reduce the size of the trimming range by dragging the four corners of the range.
List of aspect ratios (width:height)
- [Free]: You can freely trim the image.
- [Custom]: You can trim the image at the specified ratio.
4. Click [OK] to return to the Edit Window.
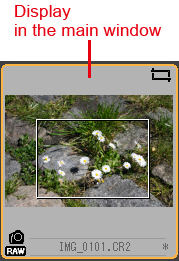
In the main window, the trimming range frame and [

] (trimming) mark are displayed on the trimmed image.
The trimmed image appears as a trimmed image in the Edit Window and the Edit Image Window, and it is printed as it appears. However, the image is not actually trimmed, so you can always restore the original image by clicking [Reset] in the trimming window or reediting it.
To actually trim the image, convert the trimmed image into a JPEG or TIFF image and save it.
5. Convert the trimmed image to another image and save it.
Please see the related information for how to convert an image into a JPEG or TIFF image and save it.
This completes the process of trimming images.


 ] (trimming) mark are displayed on the trimmed image.
