Solution
When <PAPER JAM/OPEN TONER COVER> appears on the LCD display, remove jammed paper from the inside of the machine first, then from the paper feeder if necessary.
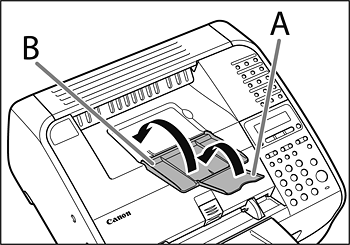
1. Close the paper delivery tray extension (A), and then the paper delivery tray (B) itself.
CAUTION
Do not close the paper delivery tray without folding the extension first.
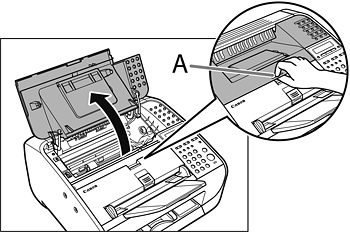
2. Open the toner cover by the notch (A).
CAUTION
Always open the toner cover first before removing jammed paper inside the machine.
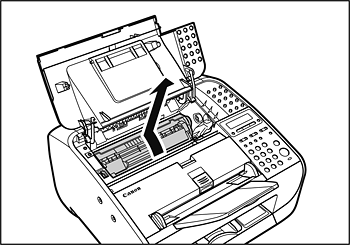
3. Remove the toner cartridge.
CAUTION
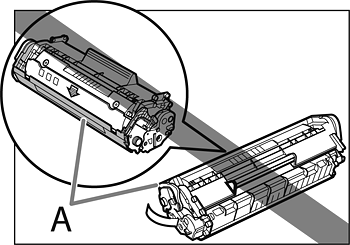
- To avoid exposing the toner cartridge to light, place it in its protective bag or wrap it in a thick cloth.
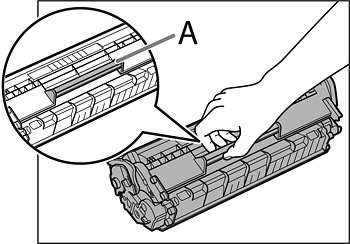
- Do not open the drum protective shutter (A).
NOTE
Always hold the toner cartridge by its handle.
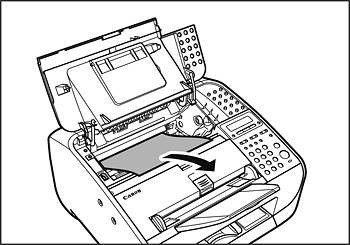
4. Gently pull jammed paper out of the machine.
CAUTION
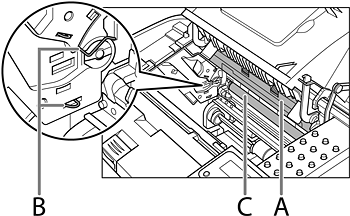
- Do not touch the fixing assembly (A) as it becomes very hot during use.
- Do not touch the pins (B) or the transfer roller (C) as this can damage the machine.
- If you tear the paper, remove any torn pieces to avoid further jams.
- If loose toner comes into contact with your skin or clothing, wash with cold water. Warm water will set the toner.
5. Hold the toner cartridge by its handle.
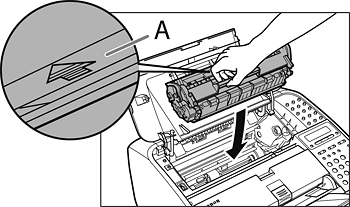
6. The arrow (A) on the toner cartridge should be facing away from you and pointing down.
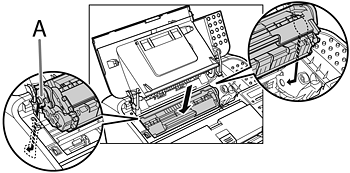
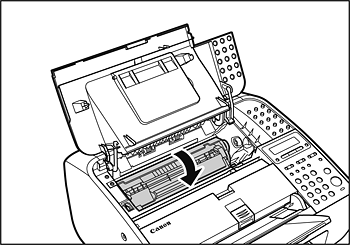
7. Insert the toner cartridge so that the guide (A) on the left side of the toner cartridge fits into the groove inside the machine and slide it down parallel to the guide.
8. Push the toner cartridge to make sure it is properly set in the machine.
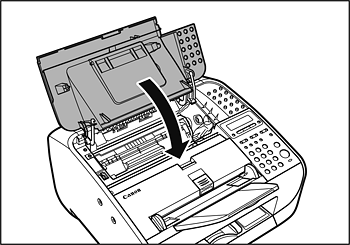
9. Close the toner cover.
NOTE
Be careful not to get your fingers caught.
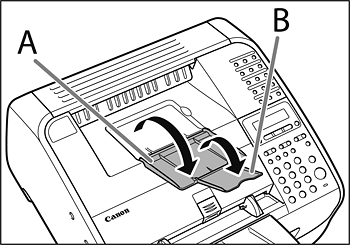
10. Open the paper delivery tray (A) and the extension (B).
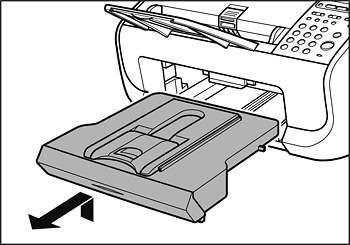
11. Lift the paper stack cover and pull it out completely.
NOTE
Make sure the back end of the cover does not catch the front paper guide.
12. Carefully pull jammed paper from inside the slot.
NOTE
If you tear the paper, remove any torn pieces to avoid further jams.
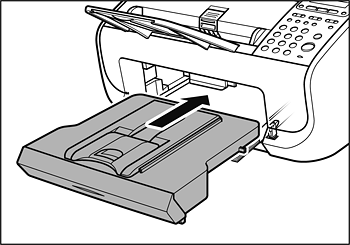
13. Insert the paper stack cover.
NOTE
Make sure the back end of the cover does not catch and lower the scanning platform.
