Solution
Use this function to scan a document larger than the document glass. The stitch-assist function scans the left half and then the right half of an item, and merges both halves into one image.
Select [Stitch-assist (11"x17")], [Stitch-assist (A3)] or [Stitch-assist (Platen x2)] in [Paper Size] to perform this function.
This function can be used with [Copy], [Print], [Save], [PDF], [Photo-1], and [Photo-2] buttons on CanoScan Toolbox. Here, the [Save] button is used as an example.
1.Start CanoScan Toolbox.
Windows:
Click the [Start] menu and select [(All) Programs] – [Canon Utilities] – [CanoScan Toolbox 5.0], and click [CanoScan Toolbox 5.0].
Macintosh:
Open the [Applications] – [Canon Utilities] – [CanoScan Toolbox 5.0] folders, then double-click the [CanoScan Toolbox 5.0] icon.
2.Place the left half of the item on the scanner.
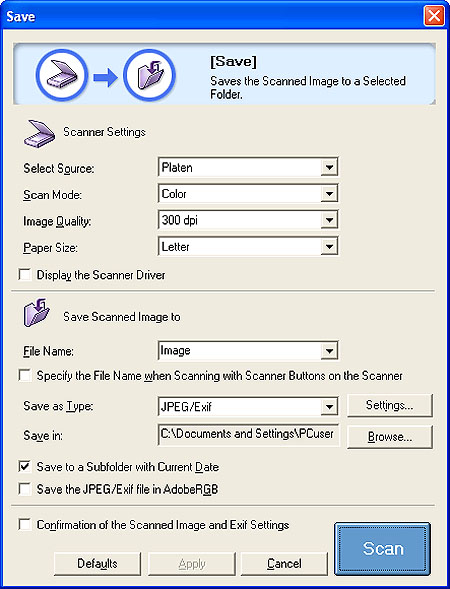
3.Click [Save] on CanoScan Toolbox.
4.Set [Scan Mode] and [Image Quality] if required.
5.Select [Stitch-assist (11"x17")], [Stitch-assist (A3)] or [Stitch-assist (Platen x2)] in [Paper Size].
6.Click the [Scan] button (for [Copy] function, the [Copy] button).
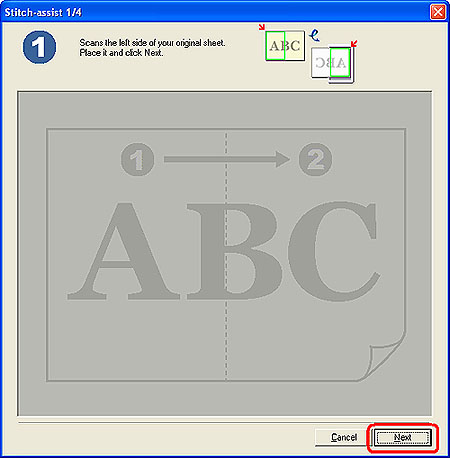
7.The 1 window is displayed. Click [Next].
The left half of the item will be scanned.
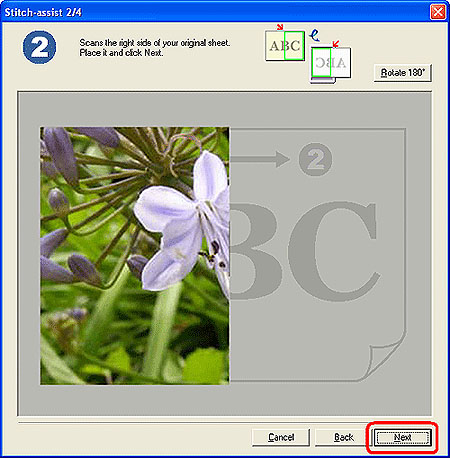
8.The 2 window is displayed. Place the right half of the item on the scanner, and click [Next].
The right half of the item will be scanned.
If the document is scanned upside down, the image in

is also displayed upside down. Click [Rotate 180°] to display the image correctly.
9.The 3 window is displayed. Drag the right half of the scanned image to adjust the position, and click [Next].
If the document is scanned upside down, the image in

is also displayed upside down. Click [Rotate 180°] to display the image correctly.
REFERENCE
- There may be color variations between the left and right halves depending on the document used or how it is set on the document glass.
- When adjusting the image position, the last clicked half of the image comes forward.
10.The 4 window is displayed. Drag the mouse to crop the area to scan, and click [Save] ([Print] with [Copy] function, [Forward] with [Photo-1]/[Photo-2] functions, and [OK] with [Print] and [PDF] functions). To readjust the position, click [Back] to return to the step 9.
11.The merged image will be created and saved in the assigned folder.